
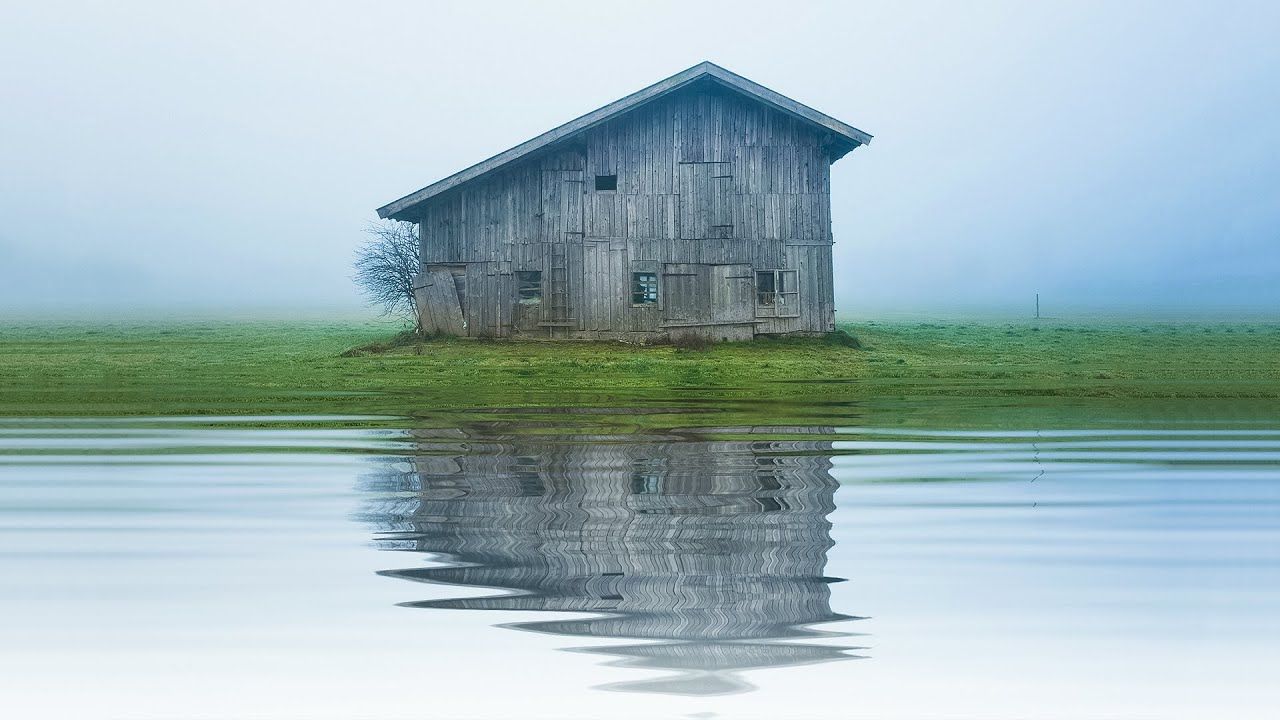
How to Add Water Ripples Using Photoshop

The water ripples look beautiful in landscape photographs. It can be seen in many travel photographs as well. If you can’t capture the natural water ripples create with Photoshop. It takes just a few minutes, and you will get the desired effect. Let’s learn how to create the water ripples with this easy to learn tutorial.
Contents
Let’s start the process!
Step1: Draw the ripple
Open the image and select the elliptical marquee tool to start creating the ripple. Now select an area in the image where the ripple can be added. Later, drag and drop the marquee tool in that area to create an elliptical selection.
Step2: Filter fun
Now we will create a duplicate copy of the elliptical selection layer in the layer panel. Press ctrl+J/Cmd+J to create a copy of the layer. Now as the copy layer appears on the layer panel make it temporarily invisible.
It’s time to give the elliptical selection a ripple effect. First, I will select layer 1 from the layer panel. After this to add the effect go to filter>distort>zig-zag and select the pond style by pressing on the style option in the bottom. You are free to adjust the style with your own suitable adjustments and press OK.
Now again make the copy layer visible from the layer panel. As you will select the copy layer, the pond ripples will hide behind it.
Now again select the layer copy, go to filter>distort>zig-zag to create more ripples. This time set the amount to 100 and ridges to 2-5 and press OK.
Step3: Merge the layers
Now as we are done with creating the ripples, we will merge the ripples layer together. For this press Ctrl/Cmd and select the two layers. After this right-click on any of the two layers to merge them.
After merging the layers make a few copies of the layer by pressing ctrl+J/ Cmd+J to create more ripples. I will make four ripples.
Now as the ripples appear on the image, it’s time to resize and reposition the water ripples. To move and adjust the ripples select move tool from the toolbox. Now place the ripples wherever you want to put it. Drag and drop the corners of the ripples to adjust its size.
Step4: Make it look realistic
Now to give the ripples a realistic look, we have to add the blur effect to them. For this go to filter>blur>Gaussian blur to make the ripples look better than before. Set the radius to 0.1-0.8pixel, but don’t exceed the amount to more than 2 pixels. Press OK.
End the task by adjusting the fill of the ripple as per the requirement.


