
Learn To Change Specific Color With Photoshop
Photoshop gives immense opportunities to make changes in the original image. We can just create a completely new image with Photoshop. One of the fascinating features of this software is changing a specific colour from the image. It may sound like very tough work, but it’s really easy. Let’s learn how to change a specific colour from the image and give a new life to it.
Get set go!
Step1: Start the task by opening the image and unlock its background layer. As you will double-click on the background layer, it will appear as layer 0 by default.
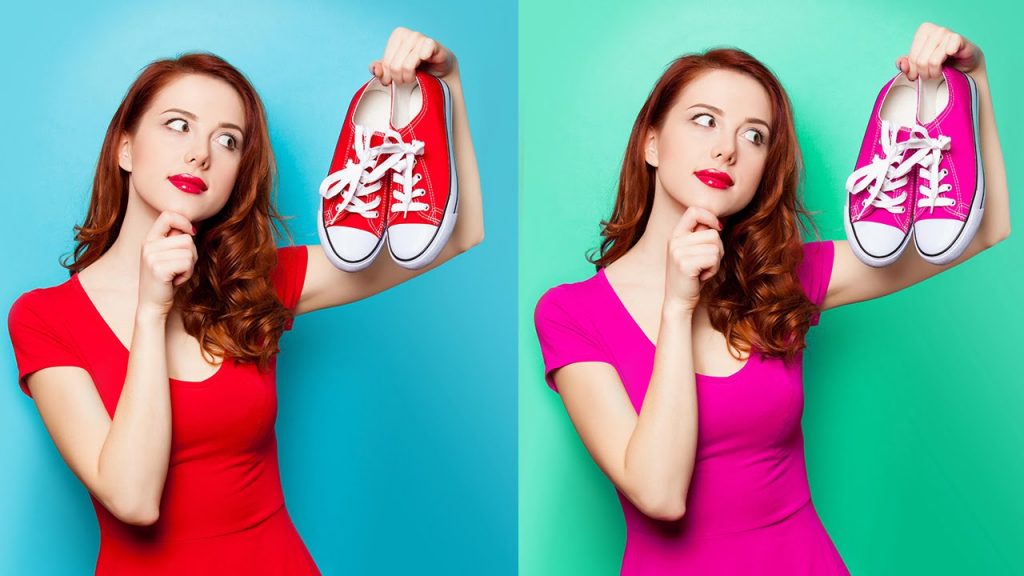
Step2: Now I will select the green colour of the girl’s dress. For this go to select>colour change and a box will appear on the screen.
As the box pops up, click on the added sample and increase the fuzziness to 38% and set the range to 100%. While selecting the dress, make sure you select every portion of the dress. The extra parts can be fixed later.

When you have selected the dressing area, it will appear as white over black background.
Step3: After selecting the dress, it’s time to add hue and saturation to the image. For this go-to layer>new layer adjustment>hue/saturation.
Select the option of colourize at the bottom and set the hue as 245, saturation as 17 and increase the lightness to 21%.
Step4: The unwanted areas are still to be fixed. Thus I am selecting the brush tool from the tool panel on the left and set its hardness to 0% and choose any size. After this just run the brush on the parts which are unwanted to erase them.
As we fix the image, we get the final result.


