
How To Add Snow To Your Photo Using Photoshop CS6
Editing pictures and adding new filters to it to make it look better is the new trend! There are many ways by which you can add different effects to your pictures and make them look real. This is a simple tutorial which will teach you how to add snow to your photo using Photoshop!
- Create a new layer
Press the F7 key to open the layer window. Click the bottom icon to create a new layer. This will add the new transparent layer to the existing photo.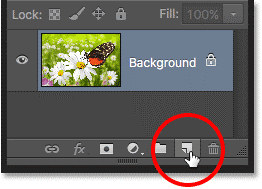
- Set background and foreground colour
Press D key to set the foreground colour to black and background colour as white. Next, use the shortcut Alt+Backspace so as to fill the new layer with black colour.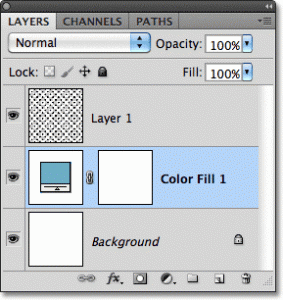
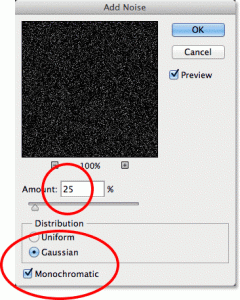
- Adding noiseGo to ‘Filter’ menu, select ‘Noise’ and then select ‘Add Noise’. Keep the amount as 150 and the distribution like Gaussian. Check the Monochromatic box. Click ‘OK’.
 4. Blur the noise
Go to ‘Filter’ menu. Select ‘Blur’ and then select ‘Blur more’. The amount of blur cannot be decided. It is done by default programming of Photoshop.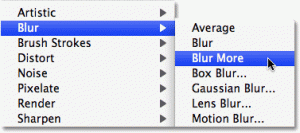
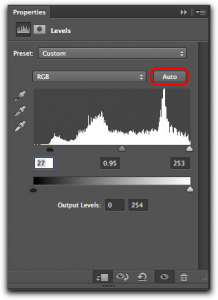
5. Reducing the blur
In the layer window, click on ‘Add adjustment Layer’. Next, go to ‘Levels’. Next, drag the white slider slightly to the right and black slider to the entire right.
- Change the blend mode
Press F7 key to open the layer window click on the layer to activate it. Change the blend mode to ‘Screen’.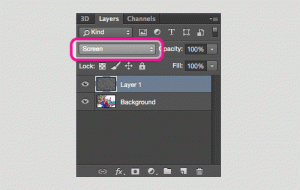
- Application of Motion Blur
Go to ‘Filter’ menu. Now, select ‘Blur’ and then select ‘Motion Blur’. The angle decides the direction of the snow. So, you can choose it according to your requirements. Keep the distance as 5-10 pixels.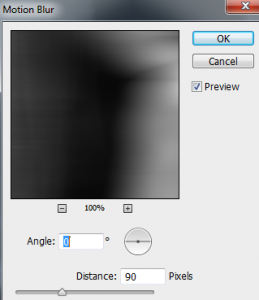
- Duplicate the layer
Use the shortcut Ctrl+J or Cmd+J to duplicate this layer. After duplicating the layer, the size of the snow is increased, because of the creation of two layers.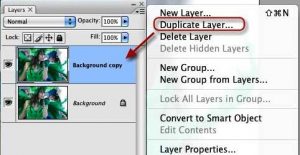
- Rotation of the new layer
We need to use the ‘Transform’ tool to rotate the layer. Click on the duplicated layer to activate it. Next, go to ‘Edit’ menu, select ‘Transform’ option and then select ‘Rotate 180’. This will decrease the intensity of the snow.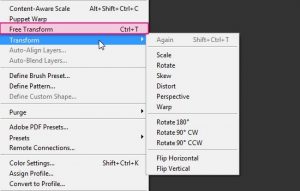
- Applying the Crystallise Filter
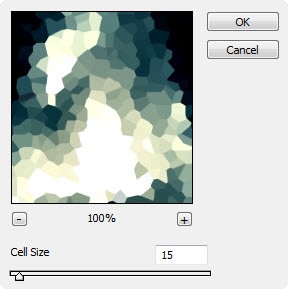
To add the Crystallise Filter to the duplicated layer, go to ‘Filter’ menu, select ‘Pixelate’ and then select ‘Crystallise’. 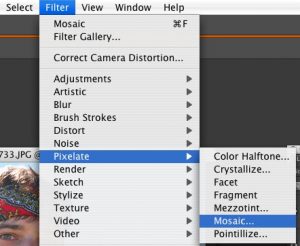
The cell size can be kept from 5 to 15.
- Applying Motion Blur
Click on the duplicated layer to activate it. Next, go to ‘Filter’ menu, select ‘Blur’ and then select ‘Motion Blur’. Don’t change the angle. Keep the distance as 15 pixels.
Next, to merge the two layers, use the shortcut Ctrl+E. You can decrease the opacity according to the requirement.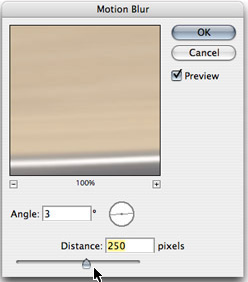 Your picture with the perfect snow effect is ready! So, now you know how simple it is to make your pictures look real! So, try it yourself now!


