
How to Remove a Background Using Photoshop
Sometimes, you’re looking for a certain picture that perfectly fits the space in the jigsaw puzzle of your mind, but you just can’t find it. But when you do, something about it puts you off. Maybe you want only part of a picture, maybe just the person or the thing but not the background. If that is your problem, then Photoshop is here for you. It is very easy to remove a background using Photoshop.
There are various ways to remove an unwanted background using Photoshop and one of the easiest ways is to use the ‘Background eraser tool’. This tool can be found in the toolbox of your Photoshop software.
To remove a background using Photoshop the following easy steps should be followed.
Step 1: Open your Photoshop software.
Double click the Photoshop icon on your home screen to open it.
Step 2: Select the image.

Open the image by going to the File menu> Open. Choose the image that you would like to remove the background from. We will use the picture shown below as an example.
Step 3: Select the Background Eraser tool
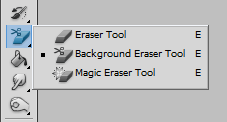
From the Photoshop toolbox, select the Background Eraser tool. The Photoshop toolbox is present on the left-hand side of your screen. The current toolbox may show a normal Eraser tool as a default selection, but we need the background eraser tool. To select it, click on the eraser tool, click on it and select the eraser with a little scissor next to it.
Step 4: Set tool value:
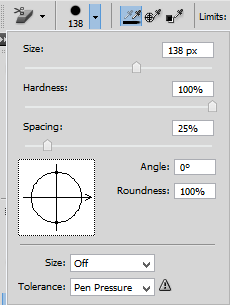
Depending upon the area of the background to remove from the image, the size of the brush would vary. To change that, go to the top of the screen and make a selection of a round and hard brush.
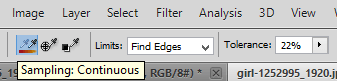
You may set the default value to the following options as:
- Sampling: Continuous
- Limits: Find Edges
- Tolerance: 20-25%
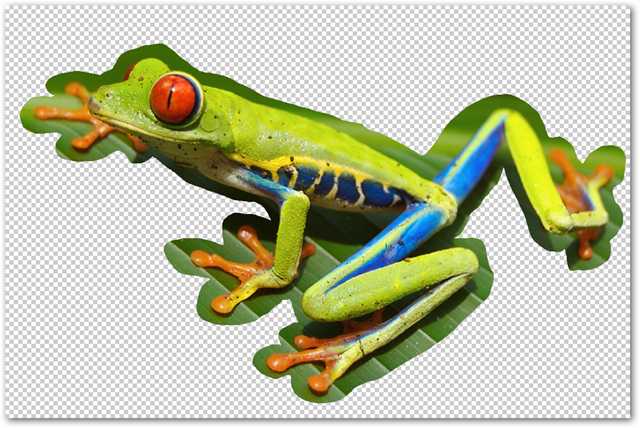
Step 5: Start removing the background:
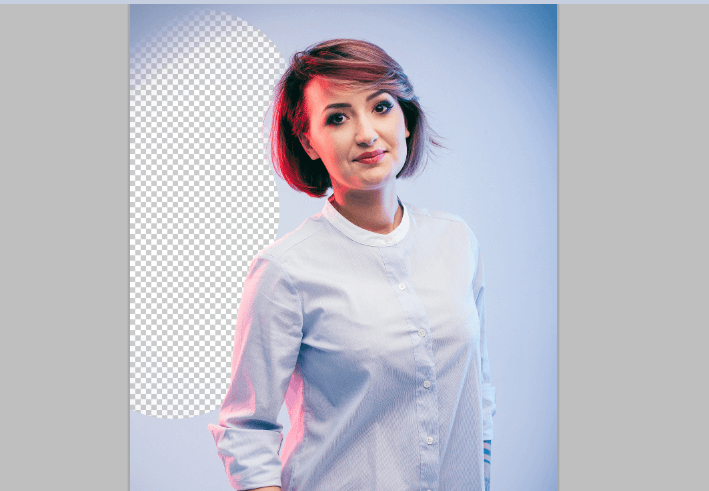
Bring the eraser tool on to the screen which has your image and starts erasing! Click on the background to needs to be removed. Drag your cursor over the area and just click. The removed background area would look like a chessboard pattern as can be seen in the picture below.
Step 5: Change the settings
While erasing the background you might erase bits of the picture too. In the picture we have used, it can be seen that parts of the hair and shirts have been removed along with the background.
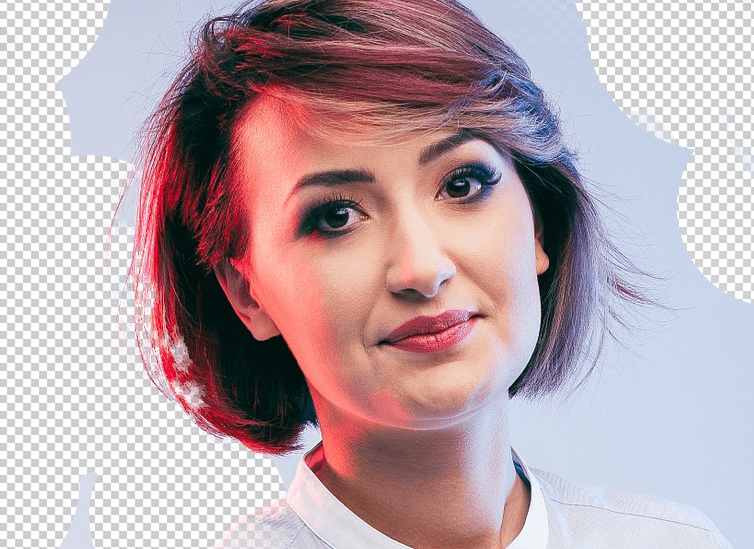
To rectify this, all you need to do is to adjust the Sampling and Limits values. In our example, we changed their values to ‘Once’ for Sampling, Discontinuous for Limits and 30% for Tolerance.
The Discontiguous Limit option lets you erase the pixels that match the colour you have sampled and that you would like to remove. Doing so, allowed us to get the areas of the background you want to remove without removing any other part of your image.
Step 6: Fine tuning
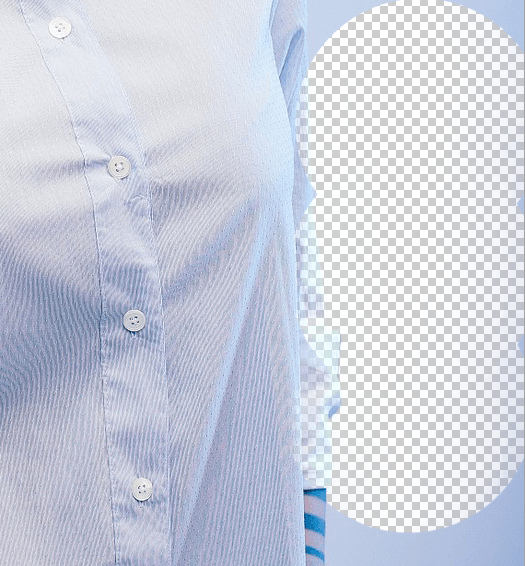
If the background is extremely simple, you might not need this step. However, if little areas of the image are difficult to remove just with the eraser properly, you can make use of the pen tool. In our image, the area around the sleeves was difficult to do away with without erasing the parts of the image we didn’t want to erase.
If a similar problem like this is what you are facing, then make use of the pen tool. Select the Pen tool from the toolbox of your Photoshop software and select the areas with the undesired parts and delete them.
The final result is here:
This method worked for us because our background was simple but how do we remove the background using Photoshop if it is complex? Let us find out.
For a complex image:
Step 1: Make a new layer.

Open up your image and make a new layer by right clicking the Background layer and choosing ‘Layers from Background’. The layer gets named Layer 0 by default. Press okay.


Step 2: Select the Lasso tool.

Click on the Lasso tool and make the changes in the toolbox as shown in the screenshot below. Now using this tool, make a rough selection of the area you would like to keep.
.
After making a selection, move it to a new layer by pressing Ctrl+Shift+J. You can delete the previous layer 0.
Step 3: Select the Eraser tool

Click on the eraser button and make the changes as shown in the picture below. Zoom in on the area and start erazing close to your image boundary. Change your brush size according to your convenience.
Once your image has been separated, and you need to remove the rest of the unrequired parts of the image which you can do using the eraser tool easily. But if you don’t wish to waste your time, there’s an alternative method.
Step 4: Select your layer. (Alternative method)


Hold Ctrl and select ‘Layer 1’. Next, go to Channels and click the third button at the bottom which will create an Alpha channel.

Select the Alpha Channel by clicking it
. 
Next, click on Edit>Fill and set the following values as shown in the screenshot.
Doing so would make your image look something like this:

Press Ctrl+D to deselect.
Step 5: Choose the paint bucket.
Click on the gradient tool and select the paint bucket from the menu options. Change the Foreground colour to black and fill in the unwanted area.
Now, press Ctrl button and click on the Alpha 1 Channel.


Next, press Ctrl+ ‘~’ (The button present left to the number 1 key.)
Come back to the Layers palette and make a new layer by using Ctrl+Shift+N. Delete your old layer.

Your final image should look like this:

So now that you know how to remove the background in photoshop let’s put this knowledge to use. Find images and experiment on them yourself too.


