
How to Create Stunning Flaming Text Effect in Photoshop
Photoshop is a remarkable editing tool that offers its users with plenty of options when it comes to enhancing their editing experiences. Photoshop CC 2014 offers a new filter called the Flame Filter that helps us add flame and fire effects around our texts or images without much of a hassle. Through this article, we’ll be guiding you step by step and help get you the desired result. So let us get started.
What we need:
- Photoshop CC 2014
Step 1: Open up Photoshop
Open up your Adobe Photoshop CC software by double clicking the icon.
Step 2: Select a suitable background.
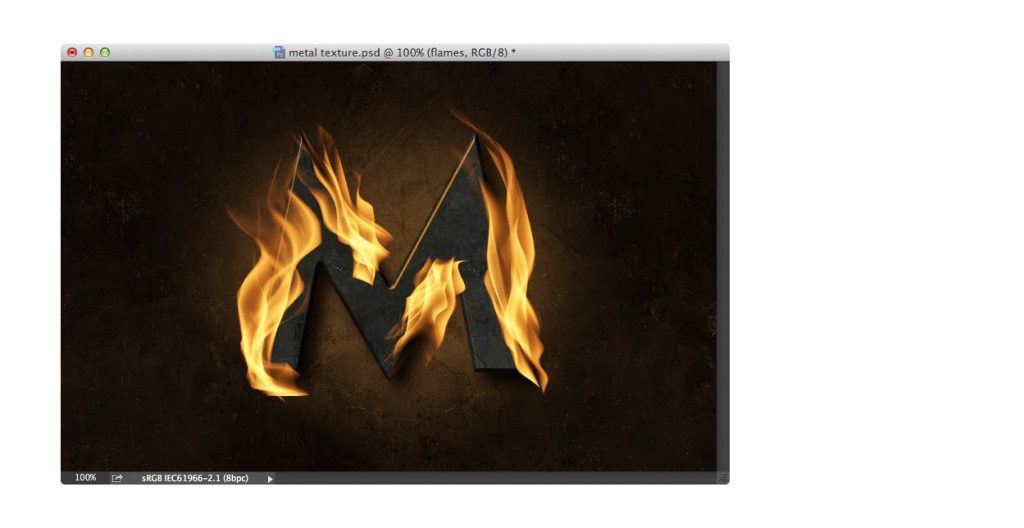
 Select an appropriate background onto which you’d like to create the flaming text effect. We’d be using the image below as a sample template. You can use a black template, textured or not it’s your choice.
Step 3: Edit the background
To ensure that the final result looks better, start with making changes in the background image. To do this, choose the Elliptical Marquee tool from your Photoshop toolbar and draw an oval shape by dragging your tool from the centre of your background image. Now, press the following keys Ctrl+Shift+I to decide what area would you like the changes to be reflected in.

Follow through these steps now,
- Go to Layer > New Adjustment Layer > Curves command.
- Select, add a custom mid tone point around the Curve line and drag downwards for a darker look.
- Blur the lines by going to Filter > Blur > Gaussian Blur.
- If you wish to give your background, a different tinge you can follow the following steps: Go to Layer > New Adjustment Layer > Hue and Saturation to change the background colour We have used the following values here to achieve the result shown in the picture: Hue (30), Saturation (50), Lightness (-40).


Step 4: Add your text
Drag your cursor over to the T tool, which is there in your Photoshop tool box in the shape of a T, and click on it. Click on your canvas now. This would produce a type layer. Add the desired text to your background now.

Step 5: Make changes to your text
Go to the Layers menu and select the Background layer that has the metal texture image. Press Ctrl+J by dragging this over to your text layer within the panel.

Now press Ctrl+Alt+G. Next, go to Look in the menu bar and select Changes> Curves command and darken the overlay Layer.

Make the following changes now:
Select the FX menu and make the following changes to the Layers Styles:
- Check the Drop Shadow box
- Opacity: Distance: 20 px, Spread: 0 px, Size: 20 px
- Bevel and Emboss: Deapth: 1000%, Size: 5 px, Angle: 130, Altitude: 48
- Highlight Color: fa8b09
- Highlight Opacity: 95%
- Shadow Color: 000000
- Shadow Opacity: 85%

Step 6: Creating the fire effect:
The Photoshop CC 2014 comes with a Flame Filter which we will be using now. Press Ctrl + Shift + N which will create a new layer. Name this layer “flames”. Select the Pen tool from the Photoshop tools bar on your left and move the pen along the places you would like your flames to appear.
Once done, stop at the point where the flames would end and press the Ctrl button and click anywhere on your document from the path points.

Step 7: Apply and adjust the settings:
Now that you know where all you would like your flame effect to appear, it is time to make some adjustments. Follow these steps:
Go to Filter > Render > Flame Filter. A dialogue box will open. Set the following values in there:
- Flame Type: ‘one flame along path.’
- Width: 37 px
- Flame Lines: 9
- Turbulent: 66
- Jag: 0
- Opacity: 49
Click on okay once you are done.

Step 8: Editing the “flame effect”:
To make the effect look more like a flame do the following:
- Go on to the Layers Panel and select the flames layer and copy it by pressing Ctrl+J and rename this layer as ‘glow’. Scroll it underneath the flames layer in the Panel list. Change the mixing mode to “Dodge” in the Layers panel.
- Go to Filter> Blur> Gaussian Blur and adjust the radius.
- Now, go to Image > Changes > Hue and Saturation.
- Again, create a named layer by pressing Ctrl+Shift+N and name this layer as ‘Extra glow’ and move this layer underneath our ‘glow’ layer in the panellist.
- Select the Brush tool now from your Photoshop toolbar on your left, followed by clicking on the Foreground colour (which is the first square of the two squares depicting current colour in use) and set the colour to CAAF50.

Step 9: Final touches:
What is a flame without sparks? To add the sparks, we begin by making a new document by using the shortcut keys Ctrl+N. In the dialogue box that opens, set the values as follows:
- Name: Spark
- Width: 50 px
- Height: 20 px
- Colour Mode RGB
- Background Contents: White-colored
Click okay.

Use the Marquee tool and draw a small rectangle in this new document. Invert colour this selected area to black by pressing Ctrl+I. Press Ctrl+D to deselect the area. Make the following changes.
Click on Filter > Blur > Motion Blur Filter.
- Distance: 13px
- Angle: 0 degrees

- Click OK.
Go back to your previous document and select the Brush tool. To create real looking sparks, you need to make the following changes:
- Click on the Window menu and go to the Brush Panel. Set the values as follows:
- Roundness: 35%; Brush Tip Shape: Size: 10 px; Spacing: 350%
- Shape Dynamics: Size Jitters: 100%; Angle Jitter: 3%; Angle jitter control: Direction
- Scattering: Scatter: 300%
- Both Axes: Ticked

Again, we create a new layer and name it ‘Coloured sparks’. Choose the colour white and start painting your sparks around the base of the flames. We can add a few details to the sparks too. To do so, press the slash key (/) on your keyboard. Now select the paint brush and set its size value to 50 px.
Select the Foreground colour square and set the colour value to EB7E13. Paint the edges of your sparks.

Your final result would look something like this.
This is just a beginning of your Photoshop journey, try your hand and play around with your designs. Happy editing to you!


