
Learn To Create A Button For Website With Photoshop
Creating a button for the website is quite tricky but easy on the same side. It is an important aspect for web developers. Let’s learn how to turn a simple rectangle into a button for your website with this simple tutorial.
Contents
Step1: Start work!
I will start the tutorial by creating a new document. Press Ctrl+N to create the working area and set the resolution to 500pixels. After a new document appears on the screen, we will move further and draw a rectangle.
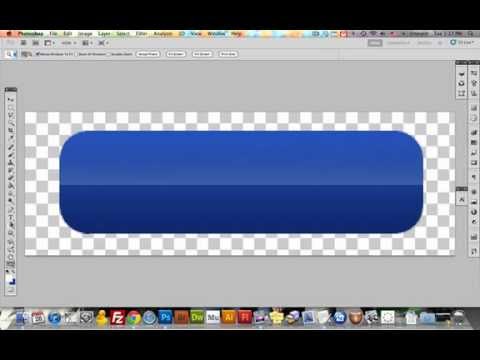
Go to the toolbox on the left side of the screen and click on the shape icon. To give a smooth edge to your website button, you can select the rounded rectangle.
You can also select the sharp-edged rectangle to create the website button.
Step2: Modify the shape
Now it’s time to add some colour to the shape. For this, we have to change the foreground colour. Pick any colour you want and fill the shape. Let the background colour remain white.
To give a darker shade to the edges of the rectangle, I will add a gradient layer. For this press F7 to make the layer palette visible on the screen. As the list appears to go to Add Layer Style and choose Gradient Overlay.
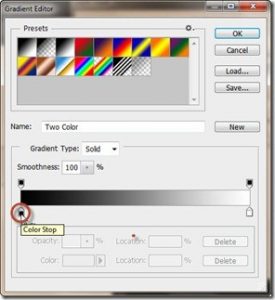
Now change the angle of the degree to 0 and change the style option to reflected. As you are done with the settings, move further by selecting the rectangular gradient bar to open the gradient editor.
 Step3: Add reflection to the button
Forgiving a reflection to the rounded rectangle, I will create a new layer by pressing Ctrl+Shift+N and after that press F7 to open the layer palette.
To give the rectangle shape an illusion of reflection below the top edge, firstly select the rectangle layer in the layer panel. Then after the section of the layer, I will go to the toolbox to select the rectangular marquee tool. Now before applying the marquee tool, ensure from the top panel that the tool is in Subtract from selection mode. This will separate the area which will not be included in the reflection effect.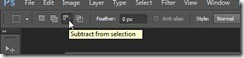
After selecting the area, it’s time to modify the selection made. For this, you will have to go to the select option in the top panel and then from the list choose to modify and contract the selection.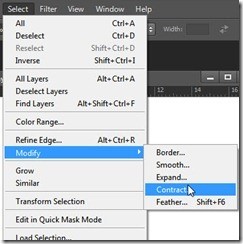
As you will select the contract option, a box will appear on the screen. Set the contract pixels to 5 and press OK.
Now again open the gradient editor to change the mode from foreground to transparent. 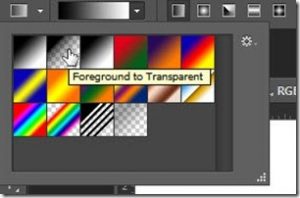
To give the reflecting effect to the rectangle, drag the gradient effect on the selected area. You can also adjust the opacity from the layer palette.

Step4: Add the text
Now as you get the website button ready, add a text using the text tool.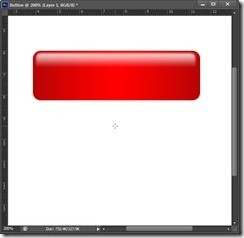
With such an easy process you’re ready to give your website a simple yet new look.


