
How To Create An Iphone Icon Using Photoshop
Photoshop is one software tool that barely needs any description. Its value outweighs its name, and hence its popularity does too. Photo editing became child’s play on the onset of this tool, and we owe a certain relief to Photoshop for making us look great in Photographs. In this article, we shall look into the steps that should be carried out to create an iPhone icon using Photoshop.
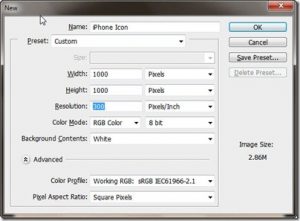
- The first step is to open Photoshop. Then press the shortcut keys Ctrl + N to create a new document. Name the file as ‘phone icon’. Now change the values of width and height to 1000 x 1000 pixels and then set the value of resolution as 300 pixels per inch.
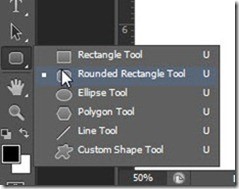
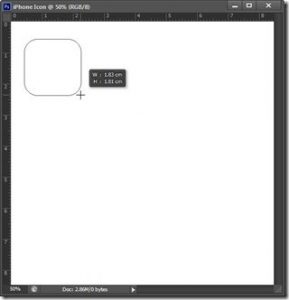
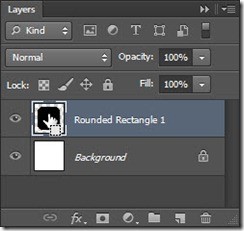
- Now go to the tool panel and click on Rounded Rectangular Tool and change the mode to ‘Shape’ in the options The next thing to do is to drag and drop the mouse cursor from the top left end to bottom right end to make a rectangle rounded at the corners. Now press F7>Right click on Rounded Rectangular Layer 1>Click on Rasterise.
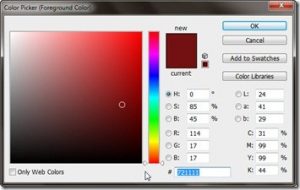
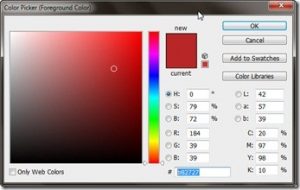
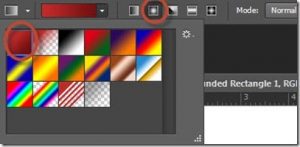
- The next step in the process is to add a gradient to the rectangle. Change the foreground and background colour. Click on foreground colour on the left panel and then select the colour as #721111 and then click OK. Now press X to swap the background colour with the foreground colour and then select the code as #b82727 and then click OK.
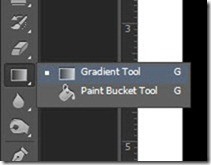
- Press F7 to open the layers palette. Then press and hold Ctrl/Cmd and then click on the layer thumbnail of Rounded Rectangle 1. On doing this, the whole rectangle will be selected out of the whole document. Now go to the left panel and click on ‘Gradient’. Then change the mode to ‘Foreground to Background’ and set the style to ‘radial gradient’. Then hold the shift button and then to apply the gradient, drag and drop the mouse cursor from bottom to the middle.
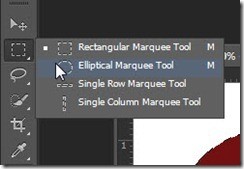
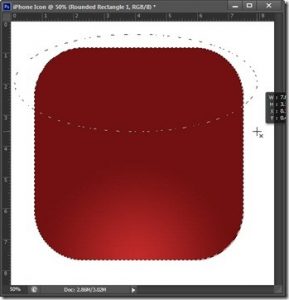
- The next step is to add a reflection to our icon. Go to the left panel and select the elliptical marquee tool and change the mode of elliptical marquee tool to ‘intersect with selection’ for overlapping the already selected rectangular area. Then drag and drop the elliptical tool as shown in the image below.
- Then undertake the following steps:
- Click on Layer>New layer and then select the gradient again. Then carry out the procedures as in step 4 to change the mode to the foreground to the background layer and then swap the foreground colour with the background
- Change the mode to Foreground to transparent and then select the style as a linear
- Click on Select>Modify>Contract and set the pixels value to 10 and then click OK. Then drag and drop the gradient from middle to the top of the icon.
- Finally, deselect the selection by pressing Ctrl + D and then reduce the opacity of the layer created to add a realistic touch to the icon. Then press F7>Add adjustment layer>Bevel & Emboss. Here change/modify the style to ‘Emboss’ and the technique to ‘smooth’. Then increase the depth percentage to 297 %, size to 46 pixels and soften to a value of 16 pixels and then click OK. Thus we have now successfully completed the process of creating the iPhone icon using Photoshop.

And this brings our learning of how to add an iPhone icon using Photoshop to a successful close. The process will become significantly easier to follow once practised for a few times.


