How to Remove Red Eye in Photoshop

How to Remove Red Eye in Photoshop
Red-eye is a common problem which occurs while shooting in the dark. When we use a flash to take pictures in the dark, we usually experience a red-eye appear on the pupil. This spoils the beauty of the picture, but we have an easy solution to this. With the help of Photoshop, we can remove the red eye effect from the subject’s eyes.
So let’s start the work to make the pictures better.
Contents
Step 1:
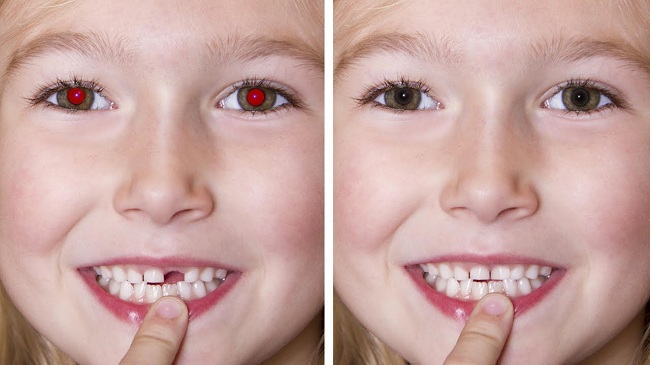
To start with I will take a picture with red eye effect. As we can see in the image below that the red eyes are not very attractive. So, we will perform some easy and quick steps to make the picture beautiful again.

Step 2:
Now I will pick the red eye tool from the toolbox to the left. You can also press shift+J again and again to make the tool appear.
As we will select the red eye removal tool, a box will appear on the screen showcasing the pupil size and darkness.
First, I will set the pupil size of the eyes with red eye effect. The pupil size refers to the amount of red colour inside the pupil. If the pupil size appears to be 50%, this means that the size of the pupil is 50% or half of the size of the pupil. In this picture, the pupil size is equal to the red colour. Thus I am fixing the size as 100%.
The darkness in terms of Photoshop means the amount of darkness needed to fill after removing the red eye. To set a natural appearance of the pupil, keep the value of darkness till 70% only. Beyond that level will make the pupils appear artificial.
Step 3:
As you set the amount of pupil size and darkness, the cursor will change into a + sign along with an eye.

Put the cursor on the red-eye area, and you’re done! If still there is some red-eye effect left put the cursor on it to remove and get the beautiful image back.
The final result.


