
Creating Instagram’s X-Pro Effect Using Photoshop
In the era of Instagram and Facebook, there is a constant need of filtering the images and giving them different effects all the time! The very popular Instagram’s X-Pro effect can now be created by you using the versatile photo-editing software, Photoshop.
All you need to do is go through the steps given below, follow them and see how simple it is to create that perfect Instagram’s X-Pro effect using Photoshop!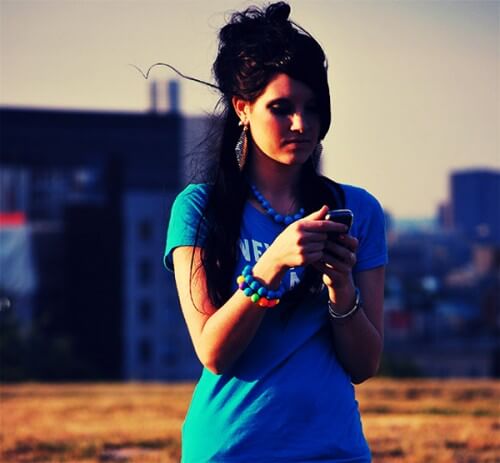
-
Contents
To create black and white image
Open the required image in the Photoshop. Go to ‘Layer’ menu, select ‘New Adjustment Layer’ and then ‘Gradient Map’. To change the image into black and white, click on the colour thumbnail. In the gradient map that appears, change the map according to the image given below:
Next, click on the boxes of reverse and dither. Also, you need to change the blend mode to ‘Darken’.
-
Add vibrancy
To add vibrancy to your image, click on ‘Layer’ menu. Select the New Adjustment Layer option and then select ‘Vibrance’. Set the slider of Vibrance to +100.
-
Add Photo Filter
Go to ‘Layer’ menu, select the ‘New Adjustment’ option and then click on ‘Photo Filter’. Set the cooling filter to 82 and density to 32%.
-
Add contrast to image
Next; you need to add contrast to your image and so go to ‘Layer’ menu. Select the ‘Curves’ option from ‘New Adjustment Layer’ option. In the dialogue box, set the preset as ‘Linear Contrast (RGB)’.
-
Reducing the contrast effect
Due to the linear contrast setting, the image may get underexposed. To reduce this effect, again to the Curves option and set the preset as ‘Lighter (RGB)’.
-
Reduce the saturation
To reduce the saturation in the image, go to ‘Layer’ menu and select ‘Hue/Saturation’ from ‘New Adjustment’ option. Set its value to -60.
-
Retouch the image
In order to retouch your image, you need to go to ‘Layer’ menu, then ‘New Adjustment Layer’ and select ‘Exposure’. Set the values of exposure to +0.16 and gamma to 0.89.
-
Adjust the contrast
Go to ‘Layer’ menu, select ‘New Adjustment Layer’ and then select ‘Brightness/Contrast’. Set the value of contrast to -30.
-
Adjust the colour balance
Select the ‘Layer’ menu. Go to ‘New Adjustment Layer’ and then select the colour balance. You can see a lot of sliders in the dialogue box. Adjust them according to the values shown in the figure below.
You can adjust any colour in your image by selecting the ‘Selective Colour’ option in the ‘Layer’ menu. This option enables you to change the amount of any colour in your image.
-
Adjust the contrast
After adjusting the colour balance, you again need to reduce the contrast so that the image looks perfect. Go to the ‘Brightness/contrast’ option and reduce the contrast to -17.
-
Add levels
After working with colour balance and contrast now is the time to add the levels. To do this, go to ‘Layer’ menu, select ‘New Adjustment Layer’ and select ‘Levels’ option, and do the following settings:
-
Add vignette
Make a new layer using Ctrl+Shift+N and name it as a vignette. Select the Elliptical marquee tool from the tool panel. Draw ellipse around the image you want to add a vignette too.
Press Ctrl+Shift+I to invert the selected area. Next, press Ctrl+Alt+R to open the Refine Edge tool. Make the value of feather as 25.5 and click OK.
Next, make the foreground colour as black. Use the keyboard shortcut Alt+Backspace to fill the selection with the foreground colour. Set the opacity to 88% and blend mode to ‘Overlay’.
-
Add noise
Make another layer and name it as noise. We need to fill this layer with the black colour which we have set as the foreground colour. So, all you need to do is press Alt+Backspace. Next, select ‘Filter’ menu, select ‘Noise’ and then select ‘Add Noise’ option. Keep the value of amount as 3.8% and click OK.
Next, set the blend mode as ‘Screen’.
-
Increase the intensity of white
To increase the whites in the noise layer, select the ‘Layer’ menu. Select the ‘New Adjustment Layer’ option and go to ‘Levels’. Click on ‘Create Clipping Mask’ and make the settings as shown in the figure:
-
Adjust the blur in the noise layer
Go to ‘Filter’ menu, select ‘Blur’ and then select the ‘Surface Blur’ option. Keep the radius as 19 pixels and threshold as 12 levels.
-
Adjust the colours
Go the ‘Colour Balance’ option as instructed in Step 9. Make the changes as shown in the figure:
-
Reduce the saturation
Once done with the colour adjustment, go to ‘Hue/Saturation’ option and set saturation as -20.
-
Sample all the layers and adjust blur
At last, use the shortcut Ctrl+Shift+Alt+E so that all the layers get sampled on one single layer.
Next, go to ‘Filter’ menu, select ‘Surface Blur’ option and change the radius to 11 pixels and threshold to 19 levels.
Also, make the opacity as 30% for the ‘Layer 1’.
And now you are all done! Your final image will have that classy Instagram’s X-Pro Effect just like Instagram! So, try these steps yourself and experience the magic of Photoshop!


