
Creating Instagram’s Sierra Effect Using Photoshop CS6
Let’s make our favourite star a.k.a Lightning McQueen! But not quite literally but let us use up it to learn how to create Instagram’s Sierra effect in Photoshop (CS6).
Step 1:
To start with, let us add the Vignette effect. Press on Ctrl+J or Cmd+J to make a duplicate layer. Click on Filter and then choose Lens Correction. The amount should be changed to -54 and +37 as the midpoint. Now, press “ok”.
Step 2:
From the Tool Panel, take the Elliptical Marquee Tool or press Shift+M repeatedly until it appears. At the centre, draw an ellipse as illustrated below.
Press on Select and choose Refine Edge. Feather to be increased, up to 185 pixels. Press “ok” after the same.
Select Layer and then choose New Adjustment Layer followed by Hue and Saturation. Press on Create Clipping Mask which is encircled and then lightness to be increased to +23.
Step 3:
Now press on Layer – New Adjustment Layer followed by Hues and Saturation. Saturation should be decreased to -14.
Press on Layer – New Adjustment Layer and lastly, Curves. Let Medium Contrast be the preset.
Click on Ctrl+J or Cmd+J to duplicate the “curve 1” adjustment layer.
Step 4:
Press on Ctrl+shift+N or Cmd+shift+N to create a new layer and rename it as Noise. Let black be the foreground colour and use the shortcut; alt+backspace/Opt+delete to fill black colour on the Noise layer.
Press on Filter – Noise – Add Noise. Prior to pressing the “ok” option, change the amount to 10.
Let mode change to Screen mode from blend mode of noise layer.
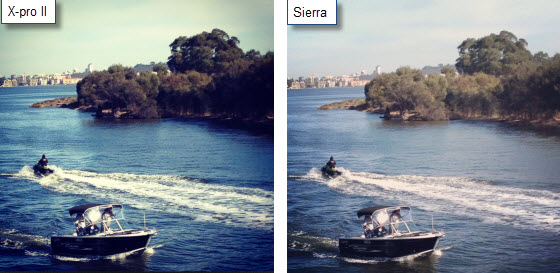
The image shall look like the one shown below with the Sierra effect.
 With the help of tools available on Photoshop, we could perfectly get the blend of Sierra effect of the Instagram fame! If the basics are grasped right, it will be an easy task to achieve the Sierra effect


