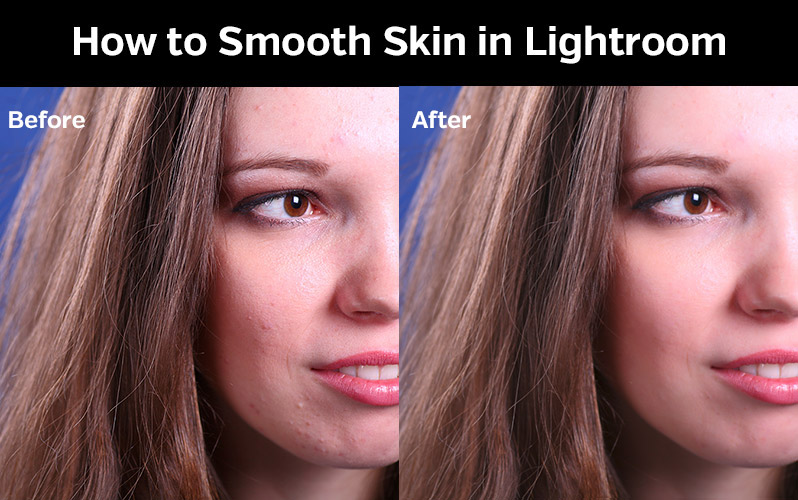
Softening Skin in Lightroom 4

As graphic designers, we don’t always have to create beautiful stuff. Sometimes, we also have to enhance what is already put on the table in front of us! How do we do that? Well, that is fairly easy – using different software and tools. Softening skin is one of these enhancing techniques. Now, what we need to know is that softening skin is different in Photoshop and different in Lightroom 4. Here what we are going to do is that we will be using ‘Brush’ tool and then decrease the ‘Clarity’ to zero for softening the skin. Let’s see how you can smooth the skin using Lightroom 4!
-
Contents
STEP 1:
Select your image and open the library module. Press D and the ‘Develop module’ will be opened. Click on ‘Brush’ now (keyboard shortcut – K).
-
STEP 2:
Now, the ‘Clarity’ is to be reduced to -100 and the ‘Sharpness’ is to be increased to 35.
-
STEP 3:
Now, open ‘Overlay’ by pressing O. The red colour will overlay the face with brushing. The red colour will indicate the patch on which you have used the brush. If you’re comfortable working without the red trail, you can turn off the ‘Overlay’ by pressing O.
-
STEP 4:
To see the outcome, turn off the ‘Overlay’ by pressing O.
Now, the problem here is that the eyes and the eyes look blurred. To fix that, press Alt/Opt and a ‘-‘ will be visible near the cursor. Now, apply the brush to the eyes and the lips. Time to turn on ‘Overlay’! Press O and start brushing the lips and eyes, etc.
Turn off the overlay by pressing O to see a clearer image.
This is it! Softening skin does add beauty to your skin (in the image)! Isn’t it easy? Of course, it is! Softening skin is an art to possess! It is all yours now.


