
Instagram Toaster Filter in Photoshop
Instagram Toaster Filter in Photoshop
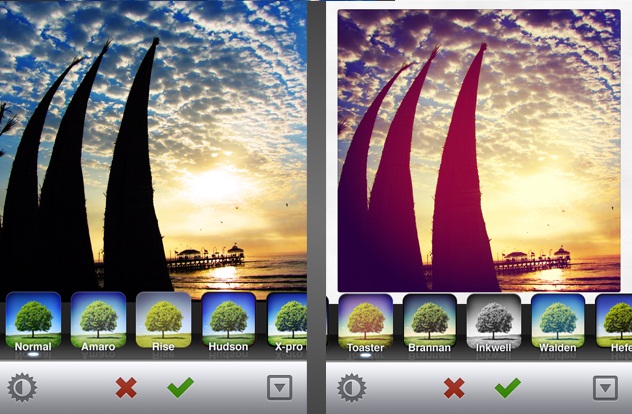
Photoshop has impacted the lives of many people as we look at the art of editing photographs. The easy approaches employed in editing photographs using Photoshop have been crucial in the popularity of this wonderful software. Add to this, in recent times the craze of editing Photographs before uploading in Instagram has been exquisite and uniquely distinct. In this article, we shall look into how to create Instagram Toaster Filter using Photoshop.
1. First, upload the photograph into Photoshop. The next step is to control the brightness/contrast in the picture. To do this, click on Layer>Add adjustment Layer>Brightness/Contrast and increase the value of brightness and contrast to +26 and -17 respectively.

2. The next step involves increasing the red colour in the image. For this, click on Layer>New Adjustment Layer>Colour Balance. Then select the tones as ‘Midtones’. Now, drag the Cyan-red slider to a value of +50 while the Yellow-blue slider to -23.
3. Then create a new layer in the image by pressing Ctrl + Shift + N. Press D to make black as the foreground colour and fill the new layer with this colour by pressing Alt + Backspace. Then change the blending mode to ‘Screen’ option.
4. Click on Filter>Noise>Add Noise and then set the amount as 14.21%. Then set the distribution as Gaussian and turn on the Monochromatic option. Then click OK.
5. In the next step, we add a little vignette effect to the image. Press Ctrl + Shift +N to create a new layer and rename this layer as ‘Vignette’. Then go to the tool panel and select the rectangular marquee tool and draw a rectangle as shown below.

6. Then press Ctrl + Shift + I to invert the selection. Then click on Select>Refine edge to feather out the selection. The dimension of the image determines the value of the feather.

7. The final step involves making #535353 as the foreground colour. Then press Alt + Backspace to select the selection. Now finally change the mode to ‘Multiply’ and reduce the opacity percentage to 59%. Then, in the end, press Ctrl + D deselect the selection.

And this brings the process of creating Instagram Toast filter in Photoshop to a successful close. The steps are typically suited for beginners and can be mastered to perfection with rigorous practice.


