
Explore the Eye Dropper Tool in Photoshop
Explore the Eye Dropper Tool in Photoshop
For the people working in the field of graphics designing or photography, colours are the most important thing. Sometimes they need to tweak a colour in the picture to make it look prettier. Sometimes they are introduced to some new colour shade in their surroundings which they would like to use in some other place but find it hard to identify it. The eye dropper tool in Photoshop comes in handy for such purposes.
When activated, this tool takes the average of colours in a selected region and gives the result. Its expansiveness lies in the fact that it has been integrated with other tools, so you can use them simultaneously.
Contents
The Basics You Need To Know
To use it, you need to activate it first. That can be done by either of the two ways: grab it from Tool panel, or press Shift+I again and again, until it shows up.

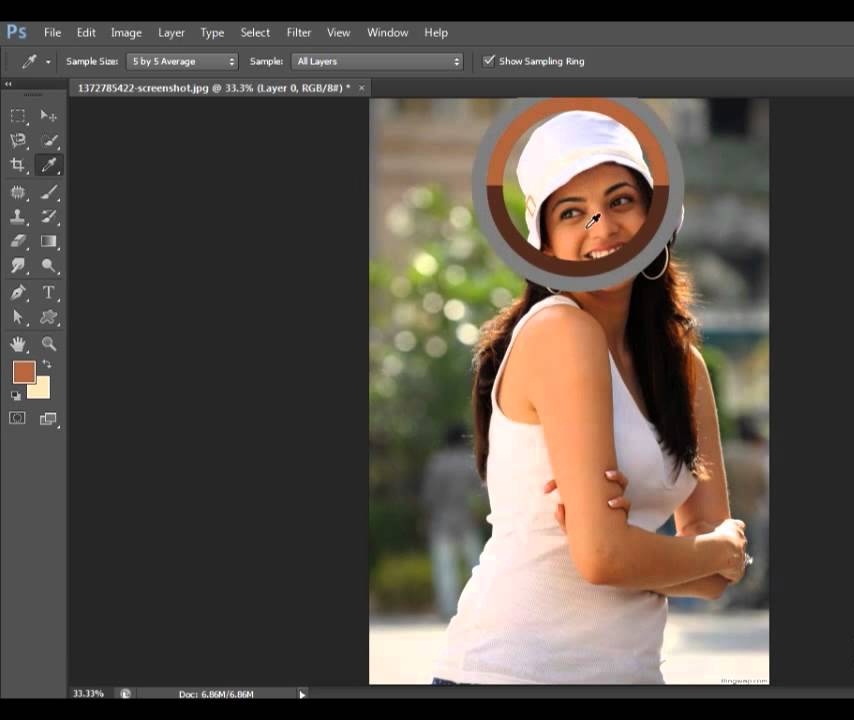
Now, for whatever colour you like in the picture you need to click on that particular area while eye dropper tool in Photoshop is activated.

A: This will show the colour of the particular area you have picked.
B: This represents the neutral colour which is half of the times grey.
C: Here you’ll see the colour currently present in your foreground.
After you’ve left hold of the mouse button, your new foreground colour will have been changed.
This is how to work the eye drop tool in Photoshop basically.
To Boost The Level A Bit
Like every other tool in Photoshop, this comes with its own set of varied options.

A: This basically covers the size of the area you have picked. If it is a single pixel, then the single botched colour will show itself to be your foreground colour. For a greater number of pixels, it will show the average of all colours in its vicinity. It is advised to use a 5 by 5 setting, but then it all depends on your choice.
B: This brings the layers into consideration. If the sample is in “Current Layer” eye tool in Photoshop will only consider that single layer. If you select “All Layers”, then it will consider the colours of all layers and give a single average result.
C: This basically covers the rings section which has already been explained above. If the option for eye drop tool is on, you will see the rings. Otherwise, you will not.
This covers the basic essence of the tool. You can go on exploring more.
Recommended Article


