
How to Increase Your Image Size without Losing its Quality Using Photoshop
This tutorial is simply about re-sampling in Photoshop. Following are the steps to be followed.
enlarge-image-size-step-4-2
Next method
The next method is “Bicubic Smoother”; this is method is recommended for enlarging image by adobe. Analogous to Bicubic, this method too involves the same technique of averaging the surrounding pixel’s color to give a better output by blurring the pixels to give more natural looking effect. “Bicubic Sharper” too is akin to Bicubic; the only difference is that it doesn’t blur the whole pixels giving an optimized transition between the old and the new images. This helps in softening the edge of the pixels. Due to this method is recommended by adobe for reducing the image size (downsizing). However many argue that this could be used to increase or upsize images “Bicubic Automatic” is a firsthand in CS6, and it articulates Photoshop to select the most appropriate method for editing images depending upon the image properties and whether the image has to be enlarged or downsized. Hard to believe the Crop Tool and Free Transform command make use of this method too
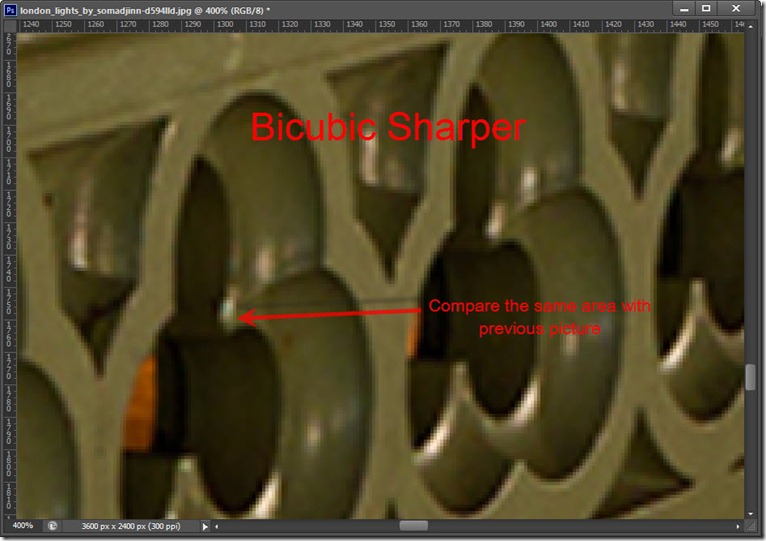
Now a Comparison Do check for yourself the difference between bicubic smoother and bicubic sharper at 400% zoom.

The difference you would see between them is the edges. See how the edges in the first picture (bicubic smoother) are softened while in the second picture (bicubic sharper ) the edges are sharpened. That is the feature which i personally adore both for sampling and unsampling. That is all. I would be back soon with more tutorials. Here is a tutorial for beginners on : How To Set The Preference For Your Photoshop.


