
How To Crop in Photoshop CS6

crop-images-photoshop-initial
Hello guys I am Somil and this article is on how to crop in Photoshop CS6. If you deal with large PSD Files, then you might have faced problem with storing such large files or maybe delivering it to your clients. Check out the previous article where I have discussed about 5 techniques to reduce the size of the PSD. Cropping is an integral part of Photography and it can be used to add focus certain part of an image. A good crop can result in a perfect image while a bad one could simply ruin it. Photoshop CS6 has incorporated a new Crop feature which is much better than its earlier versions. The Crop Tool in Photoshop CS6 is very flexible providing its users with the immense power to crop and straighten images easily. Here is a tutorial on how this feature works for Photoshop CS6.
Image Credit: http://grosnez.deviantart.com/art/Landscape-258641884
Initial image
Contents
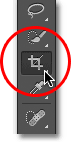
Find the Crop Tool
The Crop Square
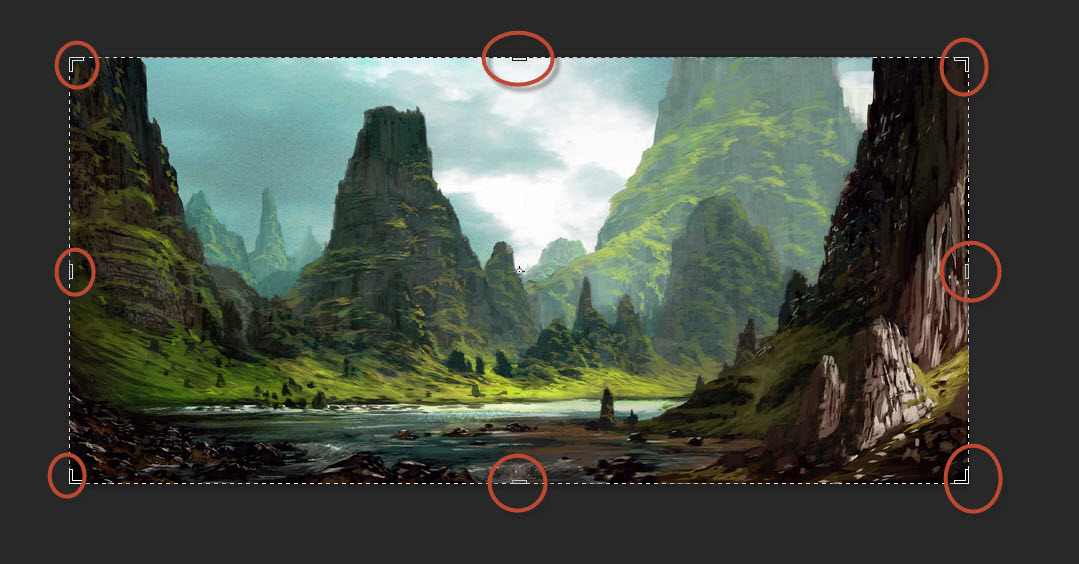
In the newer version of Photoshop CS6, the software itself seats a box also called as crop box around the image. The Crop box has handles (total 8 handles at the edges) around the box, at each of the four corners and 4 other sides namely top, bottom, left, and right hand side of the box. The work done by these handles is same as done by the handles in the previous versions of Photoshop. The main difference between the previous version and Photoshop CS6 is that the Crop Tool automatically places this square box.
Handle the Crop Box
It’s easier to figure out the area to be cropped (the area of the image we would keep) as this would be easily visible while the unwanted or the extra area of the image will be darkened. The handles around the Crop Box helps to resize and reshape the crop area by simply placing he mouse button held down and dragging it around. Whatever is inside will be kept while the outer part will be cropped and removed.
Please note that you can reshape and resize the image by holding down the mouse button and dragging the handles. The choice whether to use the initial crop handles that the Photoshop CS6 places around the image is yours. The handles are given for user’s ease. This step is very similar to what was there in the previous versions of Photoshop.
Decide on your Aspect Ratio
The crop box can be dragged freely in any direction. This is the simply the default crop box in Photoshop. However if you need any specific or standard frame size like 4 x 6 or 8 x 10 or 8.5×11, you could look for the Options Bar in the far left top of the screen. You could see the Aspect ratio option there, by default kept as Unconstrained. Clicking on the “Constrained Values” lets you choose your standard Aspect ratio form a drop down menu with various aspect ratios. I have chosen 4 x 8 (8 x 16 ) as an example.
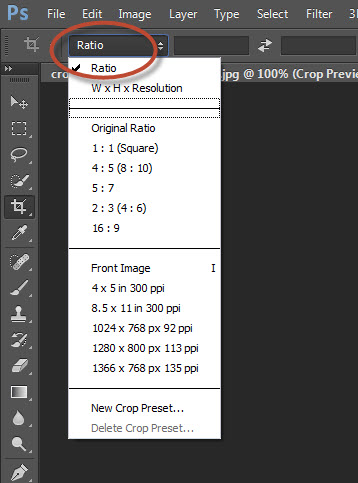
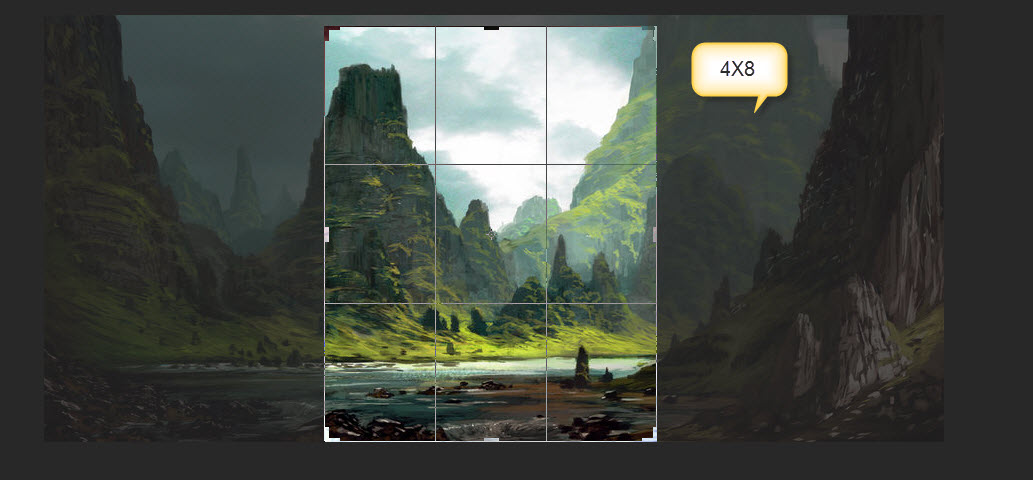
Note: Constrained cropping would only allow you to crop image images in a specific aspect ratio. The ration between your height and width of your image remains constant at any given instance.
Photoshop locks in the aspect ratio and then places the crop box back onto the image. Knowing that the aspect ratio securely locked you can resize the box by dragging the handles.
Cannot find your Aspect Ratio?
You can create your own custom, less common Aspect Ratio. Enter the values for the width and height of the boxes straight to the right of the list. That is all you need to fix your aspect ratio. Now you can also save the custom aspect ratio. Go to –> Option box –> Click on the aspect ratio menu –> Click on save as crop preset.

Choose your Orientation
You can choose from two different orientations namely Portrait orientation or the Landscape orientation. In the Options Bar –> Click on the rotate icon. This would switch your crop box quickly from portrait (vertical) to landscape (horizontal) or vice versa.
Here you can see I’ll jump back and forth form portrait to landscape mode by using the rotate icon. On clicking the icon my crop box changed from the landscape orientation to the portrait orientation. Pressing the letter X from the keyboard would also do the same job. It’s an easy shortcut. It does save a lot of time.
Image Reposition inside the Crop Box
Click inside the Crop Box –> Hold the mouse button down and drag the image.
This is a new feature in Photoshop CS6. In the earlier versions you would notice that dragging the mouse would reposition the crop box around the image. Image remains static. It is entirely opposite in the newer version. The crop box remains still while the image could be moved and positioned.
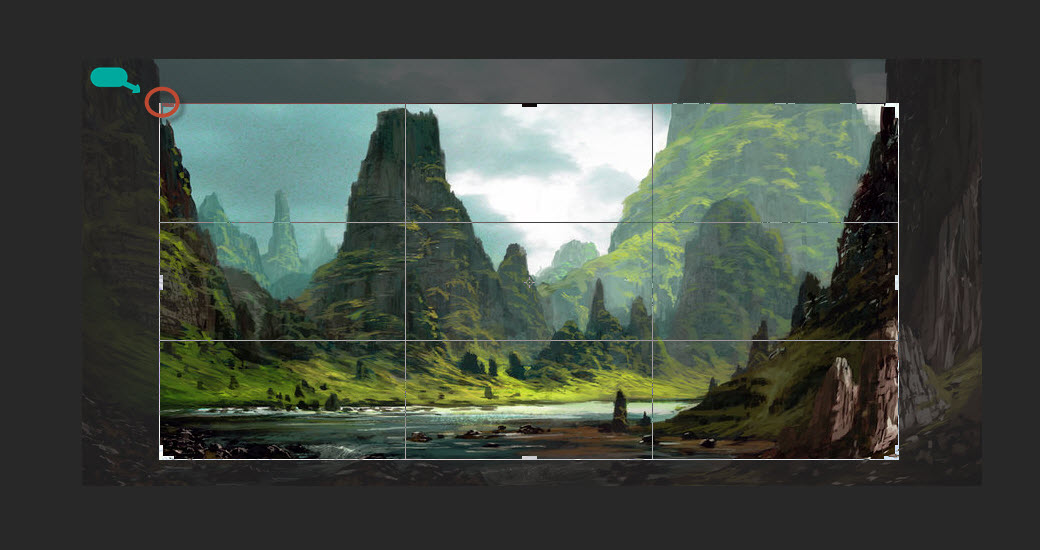
Overlay in the Crop Box
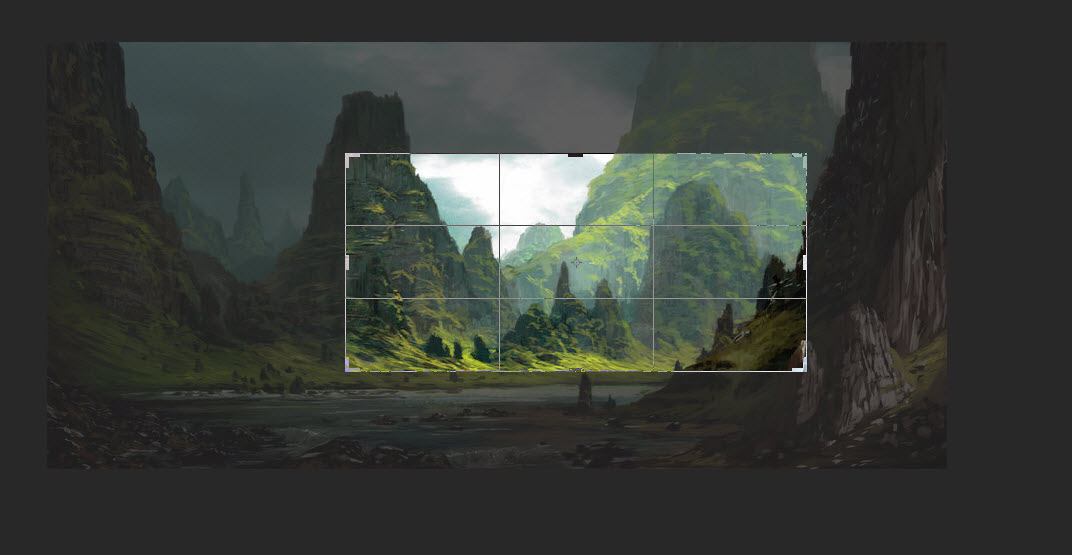
As per the newer versions of the Photoshop CS6 the Crop Box has a grid overlay inside it. It shows us 3×3 grid, also called as the Rule of Thirds. What is Rule of Thirds? The Rule of Thirds simply states that while cropping image the main subject in the image should lie on one of the intersection points of the horizontal and the vertical grid lines. This rule is not applicable for all images.
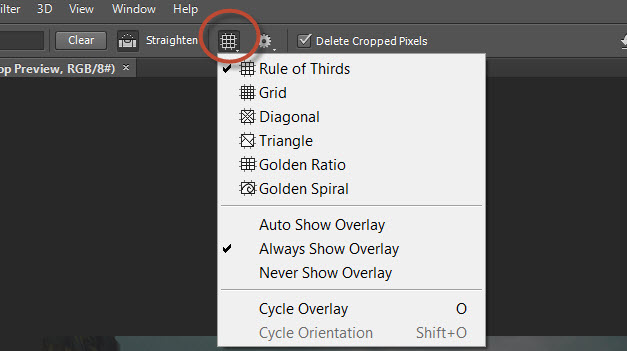
To change it Go toà View Option in the Option bar. You would find various other overlay patterns.
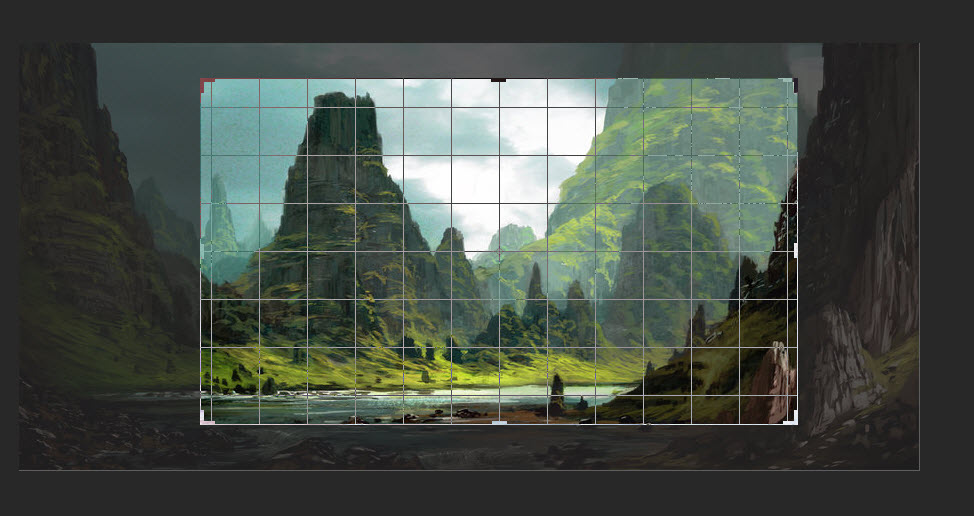
Click Rule of Thirds or the overlay you would like to choose –> Select the correct overlay pattern form the drop down menu. In the screenshot below I have selected the grid Pattern. Shortcut –> Press the letter “O” for the keyboard to toggle though the various overlays list.

Additionally you could see few other options that control the appearance of Overlay.
ü Always Show Overlay – Overlay remains on the screen all the time
ü Auto Show Overlay – Shows overlay only when you are resizing the crop box or repositioning the image. Hides when you are not making any changes to the image.
ü Never Show Overlay – Hides the overlay permanently. You can select the other two options when you would want to see it.
Photoshop CS6 lets you decide on whether to show the overlay or not.
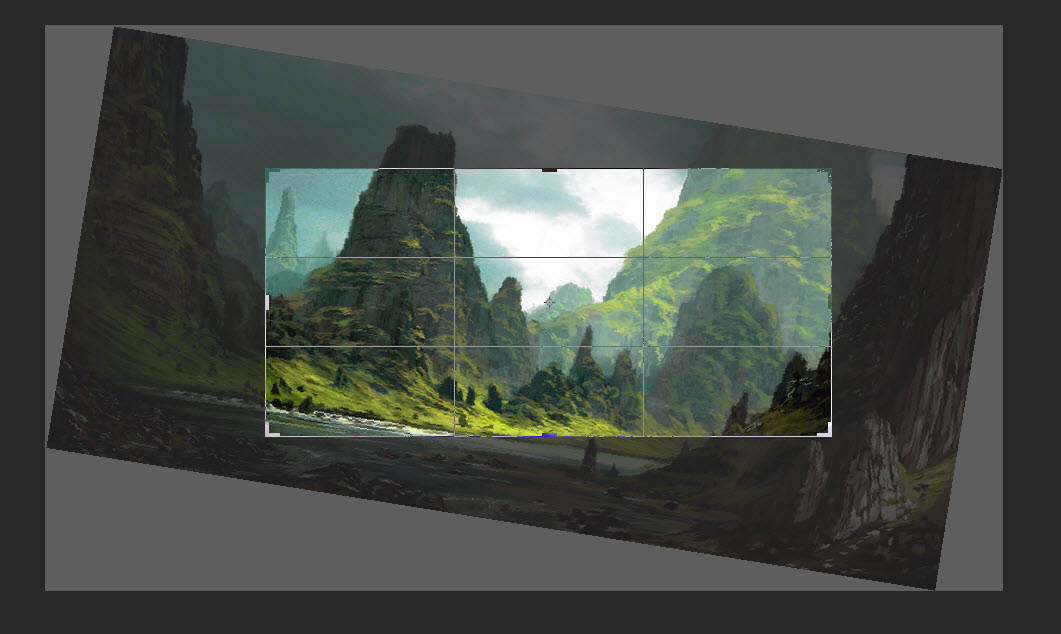
Rotate the Image
Move mouse outside the crop box. You will see the cursor change to a curved line with open ended arrow. Click outside the Crop Box. Hold down the mouse button. Now simply drag the mouse to rotate the image. The crop box remains static while the image rotates.
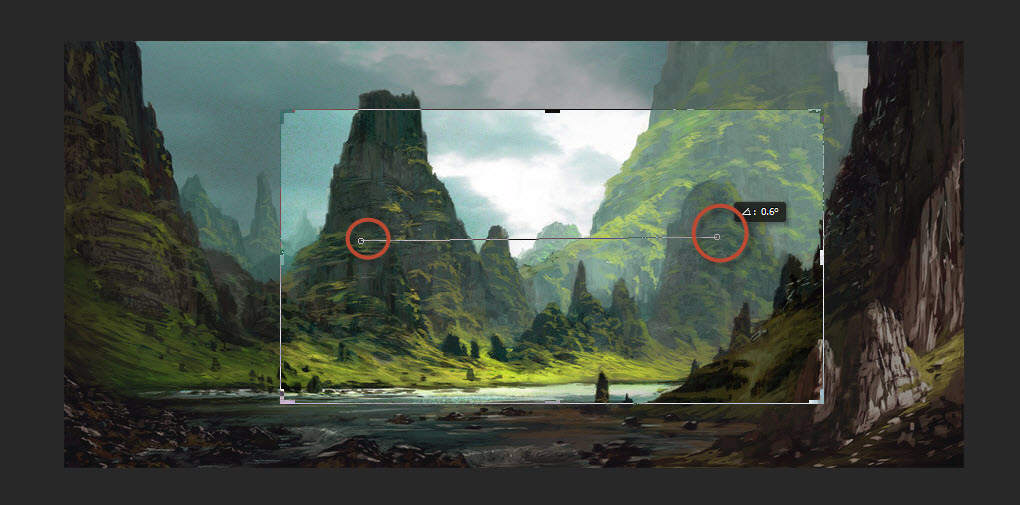
Straighten the Image
While you rotate the image the grid overlay inside the crop box acts as the reference for straightening the image. A simpler method will be Clicking and Selecting the straighten option from the option bar.
Now Select a starting point –> Click your mouse –> Hold down the mouse and drag it to the end point.
The starting point and the end point would be something that appears straight in the image. Photoshop automatically straightens the image upon releasing the mouse button.

Note: Using this tool you can give angle to your image.
Undo your action
Made a mistake then simply correct it by Going to –> Edit menu in the Menu Bar
(on top of the screen) –> Click on Undo or do as shown in the screen shot below.
Keyborad Shortcut –> Ctrl+Z (Win) / Cmd+Z (Mac).
Reset Your Action
Click on the Reset button to revert back to the original image. Its resets every change you would have made.

Cancel Your Action
Changed your mind have you? Go to Options bar –> Click Cancel or simply press the Esc key.

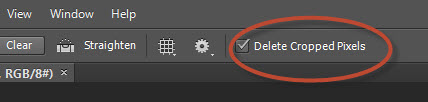
Delete Cropped Pixels
Clicking on this from the options bar would permanently delete your cropped pixels. This is also known as destructive edit. That means you would not be able to revert back to the earlier pixeled image. Best is to keep the Delete Cropped Pixels unchecked.
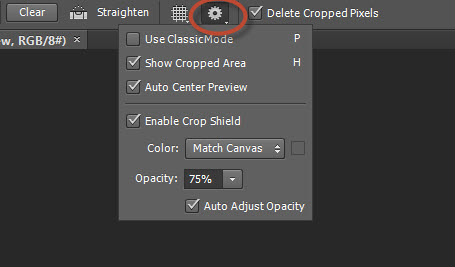
Some more Crop Action
Use Classic Mode: Turn this on if you have problem using the newer version Photoshop. This would change your cropping method as per the older versions
Auto Center Preview: Turning it on, Photoshop automatically place the exposed area at the center of the window
Show Cropped Area: Turning this on would show you the cropped area
Enable Crop Shield: When turned on, allows the darkened unwanted part of the image to be shown.
Color: Controls the color of the shield.
Opacity: Controls the opacity of the shield.
Confirm and apply the Crop
On the Options Bar –> Click the check mark. Shortcut à Press Enter (Win) / Return (Mac) on your keyboard.

Did you notice that the Crop box and the crop handles are still visible even after you have cropped your image?
To hide them Go to Tool Box –> Choose a different tool or simply press letter V (switches you to the move tool) on your keyboard.
Edit the Crop
As explained earlier once you have kept the delete cropped pixels checked then you wouldn’t be able to re-edit the image. However if you have kept it unchecked then you could simply select the Crop tool from the tool box and start cropping again. Change anything you would like, reshape or reposition the image. If you save your image to .PSD file then you could edit the image anytime you would like. However you should know that PSD files occupy large storage space. Do read our tutorial on 5 Simple Techniques to Reduce PSD Size. Now Confirm by clicking the check mark in the Option bar to finish your cropping.
The Final Image
Below is our final cropped image

If you are beginner you might want to read my tutorial on : How To Set The Preference For Your Photoshop.
Finally you would have now learned how to crop and straighten images using Photoshop CS6. Do subscribe to us for amazing tutorials.
We would be here soon with a new tutorial. Stay tuned.


