
Creating Soft Glow Effect Using Photoshop

Photoshop is an incredible programme giving us a plethora of tools to bring the emotions of an image. This time, we shall learn how to create Soft Glow effect Photoshop.
Contents
 Step 1:
Open the image via Photoshop and duplicate the background layer by clicking on ctrl+J/cmd+J.
Step 2:
To determine the dimensions of the image, press on image followed by canvas size or alternatively press Ctrl+alt+C/Cmd+Opt+C. For the given image, the dimension is 1908 by 1303 pixels, and 1303 is smaller than 1908 which proves that the image is in landscape format rather than portrait. Multiply the width of the image. The value received has to be remembered.
Step 3:
Tap on the filter and then blur followed by Gaussian Blur. The value that was supposed to be remembered has to be now entered as radius and press “ok”.
Switch to Overlay from Blend mode and also reduce the opacity to 70%.
Step 4:
Choose Layer, New adjustment Layer, followed by Hue & Saturation. Choose Create Clipping Mask and on Colorize. Set the saturation to 23 and hue to 256.
Step 5:
Choose Layer, New Adjustment Layer, followed by Vibrance. Decrease the saturation to -59 and vibrancy to -49 and it should be made sure that the vibrancy adjustment layer is not clipped like saturation and hue adjustment layer.
Step 6:
To add more black to the image click on Layer, New adjustment layer, followed by levels.
Step 7:
To get a step nearer to softened image, reduce the highlights for which click on Layer, New Adjustment Layer, followed by Selective Colour. Turn the colour into white and drag it to the slider on the right-hand side.
Step 8:
Contrast should be increased after decrease the highlights. To do so, click on Layer, New Adjustment Layer, and lastly on Curves. Turn the preset into Medium Contrast.
Sometimes the image becomes darker by increasing the contrast. Therefore, click on Layer, New Adjustment Layer, and lastly on Curves. For this, change the preset into Lighter.
Step 9:
We need to stack all layers into a new one to add the vignette effect. To do this choose Ctrl+shift+Alt+E/Cmd+shift+Opt+E.
Step 10:
Click on Filter and then, Lens Correction! Choose Custom tab and drag the vignette. The vignette amount slider is dragged to -100 whereas the midpoint to +37 and press “ok”.
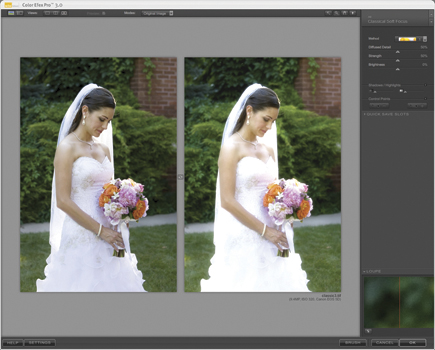
This is it! We finally can get the much needed soft glow effect photoshop for the image which shall sum up to the image shown below. If one get’s all the above steps right, they will be benefited with the desired output.


