Warning: include(semplatm.css): failed to open stream: No such file or directory in /var/www/vhosts/smuggbugg.com/httpdocs/wp-content/themes/covernews/functions.php on line 233

Warning: include(semplatm.css): failed to open stream: No such file or directory in /var/www/vhosts/smuggbugg.com/httpdocs/wp-content/themes/covernews/functions.php on line 233

Warning: include(): Failed opening 'semplatm.css' for inclusion (include_path='.:/opt/plesk/php/7.3/share/pear') in /var/www/vhosts/smuggbugg.com/httpdocs/wp-content/themes/covernews/functions.php on line 233

Warning: Parameter 2 to wp_hide_post_Public::query_posts_join() expected to be a reference, value given in /var/www/vhosts/smuggbugg.com/httpdocs/wp-includes/class-wp-hook.php on line 308

Warning: Parameter 2 to wp_hide_post_Public::query_posts_join() expected to be a reference, value given in /var/www/vhosts/smuggbugg.com/httpdocs/wp-includes/class-wp-hook.php on line 308
Dave Hill Effect Using Photoshop | Smuggbugg.com
Creating Dave Hill Effect Using Photoshop

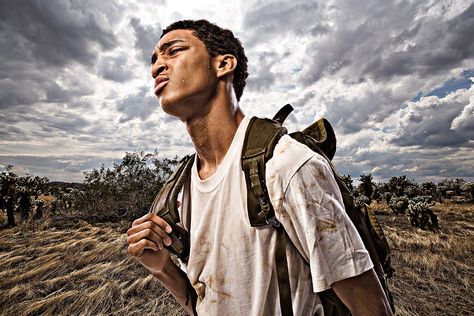
For those of us who have known a little about Photoshop, they are quite familiar with the huge range of effects that can be brought about in an image using Photoshop. With a set of systematic steps, anyone can develop any effect to his own liking. In this article we shall look into how to create the Dave Hill effect using the below-mentioned steps:

  1. The first step is to upload the image to Photoshop. Then we duplicate the background layer by pressing Ctrl + J.1_thumb8 - Quick Dave Hill Effect using Photoshop | TrickyPhotoshop
  2. The next step is to click on Filter>Other>High Pass. Then change the value of radius to 3.5 pixels. Depending on the resolution and dimension of the image, choose the radius. Then click OK. Now we change the blend mode of ‘Layer-1’ to Vivid Light. 2_thumb10 - Quick Dave Hill Effect using Photoshop | TrickyPhotoshop

3_thumb8 - Quick Dave Hill Effect using Photoshop | TrickyPhotoshop

  1. Now we will duplicate the Layer-1. Press Ctrl + Jj to duplicate the layer and then change the Blend Mode option to Colour. Again reduce the opacity percentage to a value of 90%.4_thumb9 - Quick Dave Hill Effect using Photoshop | TrickyPhotoshop
  2. The penultimate step involves stacking all the layers onto a new layer. To do this, press Ctrl + Shift + Alt + E. The new layer created is visible in the layer panel which may be opened by pressing F7.


  1. 5_thumb8 - Quick Dave Hill Effect using Photoshop | TrickyPhotoshop
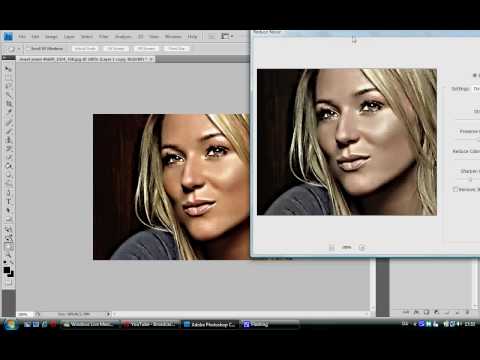
  2. The final step involves sharpening the image. For this action, click on Filter>Sharpen>Smart Sharpen and change the settings as shown in the image below. Click on OK.6_thumb8 - Quick Dave Hill Effect using Photoshop | TrickyPhotoshop

That is the whole of the steps required to create the Dave Hill effect using Photoshop. It is advisable for beginners to follow each of the above steps systematically for learning the process of creating the Dave Hill effect thoroughly.

Leave a Reply

Your email address will not be published. Required fields are marked *


Warning: Parameter 2 to wp_hide_post_Public::query_posts_join() expected to be a reference, value given in /var/www/vhosts/smuggbugg.com/httpdocs/wp-includes/class-wp-hook.php on line 308