
How to Add Wooden Frame To Images in Photoshop
We’ve all heard about the wondrous tool that is Photoshop. This marvellous editing software has been used by professionals and amateurs alike. The professionals, airbrushing the models and the amateurs using it to swap faces as pranks or to remove that one pimple that was ruining a perfect picture, we’ve seen it all.
With Photoshop, the editing possibilities are endless, but for now, we’ll stick with one. In this article, we’ll tell you how you can add a wooden frame to your pictures. A pretty wooden frame can really add a certain flair to your picture which is artistic and good on the eyes. So, without further ado, let us look at how we achieve this task of adding a wooden frame to our picture using Photoshop!
Contents
Step 1: Open Photoshop.
Double-click the Adobe Photoshop shortcut on your desktop to launch the software.
Step 2: Choose your picture.
Go to File > Open to select the picture to which you want to add the wooden frame to. Select the picture and click on open. This will open your desired picture on your working space in Photoshop.
Step 3: Resize canvas.
Our very first step will be adding some extra space around our picture where we want the frame to be. To do that, we need to resize the canvas. How do we add the extra space? It is pretty simple. Just go to the Image menu> Canvas size (or you may use the shortcut keys: Alt +Ctrl +C.) This will open the Canvas Size dialogue Enter the height and width values that you want and click okay once satisfied. There are two things to keep in mind, though:
- Make sure the box next to “Relative” is checked.
- The canvas extension colour reads white.
Step 4: Create a new layer.
Go to the Layers Palette and click on the new layer icon to create a new layer. A new layer with the name, “Layer 1” would be added in the Layers Panel on doing so. The document window will remain unaffected,
Step 5: Fill layer.
Now that we have our extra space, it is time to fill it. Thankfully Photoshop doesn’t create a lot of hassle for us to fill the layer. To do this, all we need to do:
- Download any picture with a wooden background and save it.
- Open this image in Photoshop.
- Go to the Edit menu> Define Pattern.
- A dialogue box will open. Name your pattern as you desire.
- Go to the Edit menu again> Preset manager.
- In the preset type, select a pattern from the drop-down
- Select the saved pattern from here. Click done.
- Click on save set.
- A save window will open up. Here, save your pattern and click Save.
Come back to your picture now. Make sure that the ‘Layer 1’ is selected. Now, go to the Edit menu> Fill. This will open the Fill dialogue box. In there, make the following changes:
- In the contents box, change the use of the pattern and set the ‘Custom Pattern’ as the wooden one that we have had saved.
- Click okay and exit the dialogue
Now, you will observe that your entire picture gets filled with the pattern. No worries we are going to fix that.
Step 6: Select the Marquee tool.
To fix our little problem, we start by selecting the ‘Layer 1’ from the Layers Palette. Now, click on the little eye icon that is next to the picture. This will make the picture that you wish to frame appear. Now select the rectangular marquee tool from the Photoshop toolbox and select the portion of the picture that you want within the frame. Now go back to the Layers Panel and click on the box where we deselected the eye from. The wood fill will appear again. Hit the delete key to rid the area of the extra fill.
Step 7: Invert the selection.
Now we need to invert the selection. To do this, we will go to the Select menu and click on Inverse (You may use the shortcut keys Shift + Ctrl + I.) This will select the frame area.
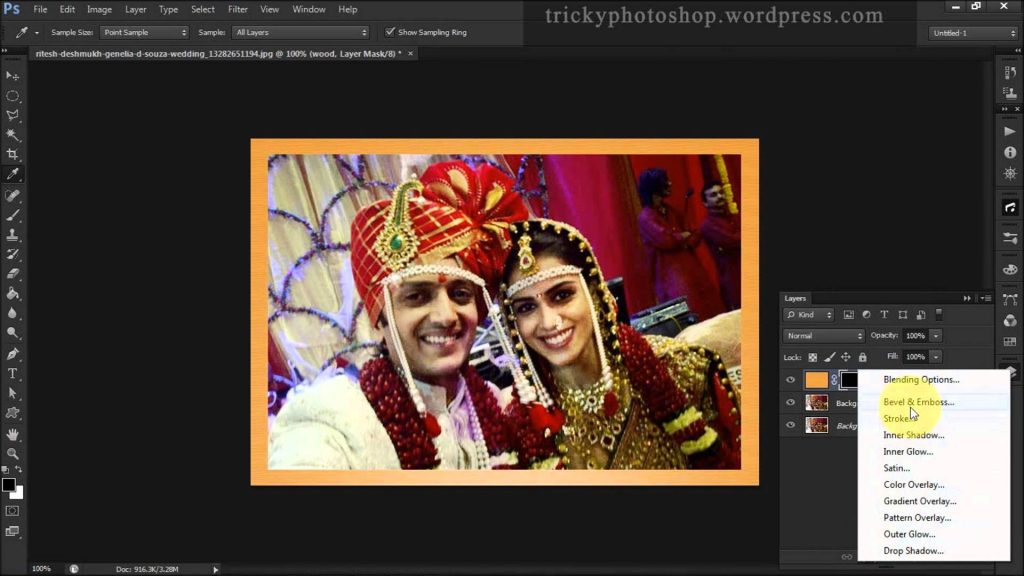
Step 8: Apply effects.
If you are satisfied with how your picture looks you need not do this and instead just save your picture as a .jpeg file. But, if you wish to add a bit of effect select the Fx option from the Layers Panel. Click on Bevel and Emboss. Make changes in the dialogue box that open till you are satisfied with your result.
Sep 9: Deselect and save your result.
Press Ctrl + D to deselect the selection and marvel at your result.
You can always play around with different settings if you aren’t satisfied. That is the thing about Photoshop; there is no stopping. Play around with the Opacity, edit the picture in the frame by changing the highlights and shadows, the hues and the saturation, change the brightness or contrast, the possibilities are endless! This is just the beginning of your Photoshop journey after all.
If you aren’t satisfied with the wooden texture of your frame, you can always Google a different texture, save it, as taught in step 5, and use that and see how that works out. So go ahead and give it a try.


