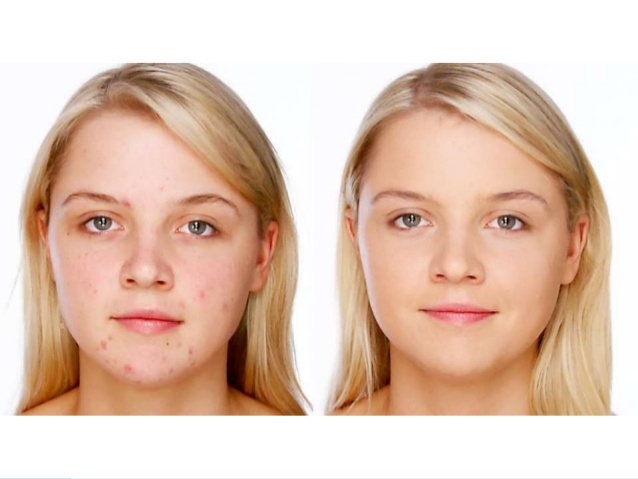
How to Use Spot Healing Brush Tool In Photoshop

How to Use Spot Healing Brush Tool In Photoshop
The advent of Photoshop has opened up new exciting possibilities in the field of Photography. Now moments can not only be captured but rather they can also be painted according to our imagination. The diversity of the options available on Photoshop makes it an essential tool for creating perfect photographs. In this article, we shall see how to use the Spot Healing Brush Tool in Photoshop:
Contents
STEP 1:
First, open the image in Photoshop. Then go to the left panel and here select the ‘Spot Healing Brush Tool’ option. This may also be done by pressing Shift + J.

STEP 2:
The next step is to heal the unwanted portion from the image. This may be done by clicking on the desired part of the image multiple times to allow a smoother finish and edit. After clicking the mouse for a number f times, it may be noticed that the undesired portion has vanished from the original image. The Spot Healing Brush tool acts by filling the objects with the nearby pixels.


STEP 3:
Some features of the Spot Healing Brush Tool are as follows:
- Mode – It selects the mode of the brush. Normal mode is widely and commonly used. The replace mode may also be used to work finely for soft round brush because of its ability to retain the fine details in the image.
- Proximity Match – this option allows Photoshop to match the edges of the brush with the nearby pixels.
- Create Texture – This option is selected when a lot of details are to be included in the image. The Photoshop will search within the image to fill the image when this option is selected.
- Content Aware: By selecting this option, the Photoshop can automatically create pixels to fill the object by analysing the nearby pixels.
- Sample All Layers: This option allows all layers in the image to be taken into consideration while healing the image.
- Pressure For size: This option is applicable only for those who use graphic tablets. Turning on this option results in automatic adjustment of the brush size according to the pressure applied on the touchscreen.
We have thus studied the features of the Spot Healing Brush Tool in the above article. The steps of using Spot Healing Brush Tool is very easy, and as we saw, the features are almost the same as that of Healing Brush Tool as well.


