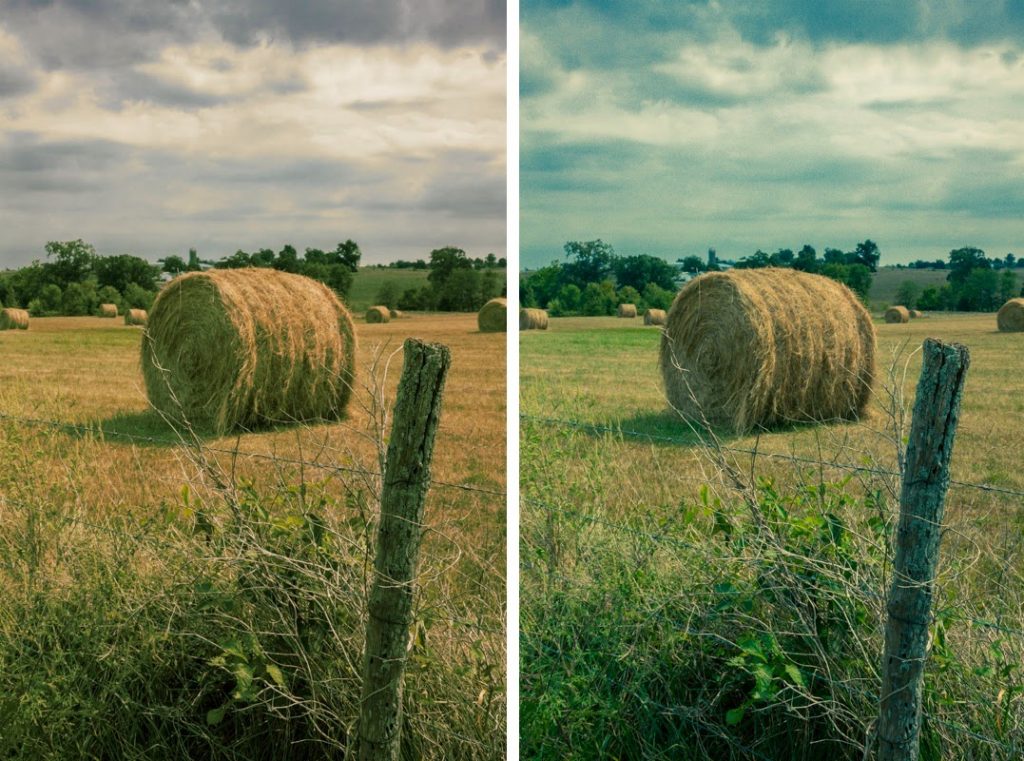
Generating Split Toning in Photoshop CS6

Great images don’t come across easily. Making an image great is not all that difficult! With the blessings of Photoshop bestowed upon us, creating images that look fantastic has become very easy. Tools for creating split toning in photoshop are one of them. Let’s see how split toning effect can be used to make images look better!
For this purpose, we’ll be using two stock images and a few adjustment layers (a must for split toning effect). Here’s how:
-
Contents
STEP 1 to Create Split Toning in Photoshop:
After opening your image in Photoshop, the first thing you need to do is to convert it to Black and White. The method is to go to Layers à New Adjustment layer à Black and white. Let the colour adjustment of other colours remain as that of by default. Now, shut the panel.
-
STEP 2 to Create Split Toning in Photoshop:
After turning your image black and white in colour, you can now adjust the other colours according to your wish. Layers à New Adjustment layer à Colour balance is the route you have to follow. The ‘Tone’ has to be changed to ‘Midtone’ and decrease the ‘Red’ balance to -28.
Then, the ‘Tone’ has to be changed to ‘Shadow’. Here, the ‘red’ is to be increased by 10 and the ‘Blue’ is to be decreased by 30.
Now, the ‘Tone’ has to be changed to ‘Highlight’. The ‘Red’ is now to be increased by 30, and ‘Blue’ is to be decreased by -73.
-
STEP 3 to Create Split Toning in Photoshop:
Now, select Layer à New Adjustment Layer à Brightness and Contrast. The ‘contrast’ is to be decreased to -50.
-
STEP 4 to Create Split Toning in Photoshop:
Now, select File à Place. Now the ‘Noise Texture’ is to be located and clicked open. Align the noise texture properly (if it isn’t already properly aligned) by using the ‘Free Transform Tool’ for which the keyboard shortcut is – Ctrl+T/Cmd+T.
The ‘Blend’ mode is now to be changed to ‘Screen’ reducing the opacity to 62%.
-
STEP 5 to Create Split Toning in Photoshop:
Select Layer à New adjustment layer à Vibrance. The vibrancy is to be decreased to -24.
-
STEP 6 to Create Split Toning in Photoshop:
Select Layer à New adjustment layer à Curves. Let your curve look like the one shown below in the image. This will add a darker shade to our image.
-
STEP 7 to Create Split Toning in Photoshop:
It’s time to stack all the layers on to a final layer! Press Ctrl+Shift+Alt+E/Cmd+Opt+Shift+E for the same. No significant change in the image will be seen until you open your layer panel by pressing F7. This will display a new layer that is literally a stack of all the layers!
Select Filter à Lens Correction. Now, select the ‘Custom’ tab, select the slider of ‘Amount’ in ‘Vignette’ to the left. Select ‘OK’.
Your final image will look something like this:

If you have followed all the steps properly, the final outcome of all this process should look like this:
There, who thought split toning effect could give such beautiful outcomes? Wasn’t using split toning easy? With the right guide split toning can work wonders for your image. So, are you ready to make your image look beautiful using split toning effect now?


