
Generating Instagram’s Mayfair Filter Using Photoshop

Back in the day when black and white photographs were available, coloured photographs were a dream. And then came the age of coloured photographs that bound our special memories and moments forever. Now, there are no ends to which we can play with coloured photographs. This is facilitated by using Photoshop. Instagram Mayfair Filter Photoshop is the another amazing effect.
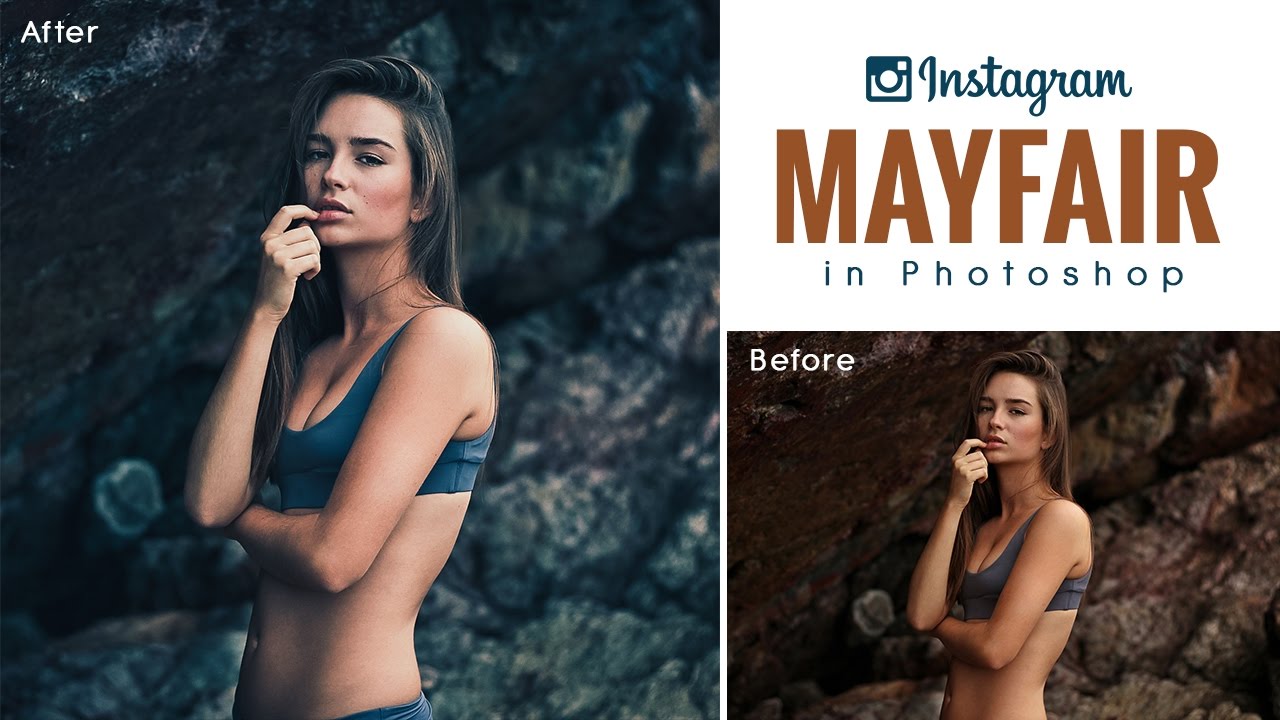
The effects we come across while uploading a photo on Instagram are attractive and eye catchy. With beautiful shades, these effects add a nascent flavour to our photographs. One of these effects is the Mayfair Effect. In this article, we shall learn how to create the Instagram effect using Photoshop CS6. Here are the steps involved in creating Instagram Mayfair Filter Photoshop:
- First, upload the image into Photoshop. Then press Ctrl + shift + N/ cmd + Shift +N to create a new layer and rename the layer to noise. Now press D to make black as the foreground colour and then press Alt + Backspace/Alt + Delete to fill the ‘Noise’ layer with the foreground colour i.e. black.
- The next step is to click on Filter>Noise>Add noise to add some Noise. Now change the amount depending on the dimensions of the image. For larger dimensions, keep it between 20-25%. Now change the distribution to Gaussian. Click on OK. Then set the blend mode of ‘Noise’ layer to screen.
3. Proceed as mentioned below:
- Click on the Background layer activate it. Now go to the tool panel and click on Rectangular Marquee Tool and draw a rectangle as shown.
- Click on Refine edge and set the feather value to 107 pixels. For smaller images, it should be about 30-70 pixels. Click on OK.
- Now press Ctrl + J/Cmd + J to duplicate the selection into a new layer.
- The next step is to increase the contrast on ‘Layer 1’ Layer. For this, click on Layer>Add adjustment Layer>Brightness and Contrast.
Now change the contrast percentage to 83% and then click on Create Clipping Mask at the bottom of the contrast adjustment panel.
- The next step is to create a new layer by going to Layer>New>Layer and rename it to Vertical Vignette. Now go to tool panel and grab the Rectangular Marquee Tool. Now change the mode in the options panel to Add to Selection. Now make 2 vertical rectangles in the image using the rectangular marquee tool.
- Now click on Select>Refine Edge. This opens the refine edge box and there increase the feather value to in between 150-160 pixels. For smaller images, the value is between 50-100 pixels. Click OK.
Now press Alt + Backspace/Opt + Delete to fill the selected area with foreground colour i.e. black. Now change the blend mode Of ‘Vertical Vignette’ to Soft Light.
- Now click on Layer>New>Layer to create a new layer.
- Now go to Tool Panel and click on elliptical Marquee Tool. Now change the mode to Add to Selection. Now draw two semicircles as shown in the image and also change the opacity percentage to 57.
Now change the foreground color to White and press Alt + Backspace/Opt + Delete to fill the selection with white colour. Now change the blend mode to Soft light while reducing the opacity percentage to about 58. Again reduce the opacity value of ‘Vignette’ to 28%.
- The final step involves the following:
- Go to the bottom of Layer Panel and click on Add adjustment Layer and then click on Curves.
- Change the preset option to medium contrast (RGB).
- Now again go to Add Adjustment Layer and click on Levels and take the slider to 0.83 value.
- Now click on Add Adjustment Layer again and then click on Hue and Saturation. Here decrease the saturation value to a value of -20.
And we have now successfully wrapped up the proceedings on how to create Instagram Mayfair filter in Photoshop CS6. The steps are specifically designed for beginners. For people who are somewhat acquainted with Photoshop, a few common steps may be done without referring this article. Lastly, practice as much as you can, to be fluent with the process of creating Mayfair effect in Photoshop
.


