Understanding Partial Black and White Effect In Photoshop
With a new filter coming out each day, the partial black and white effect for your photo is one of the hottest trends on social media. This effect helps one to attract their viewers’ attention to a specific thing in the image! With a classic combination of colours with black and white, this effect has to be on the must-learn list!
So, follow the steps below and learn the photo filter to understand the partial black and white effect using the very popular Photoshop software.
Contents
1. Convert the image to grayscale
Open the required photo in Photoshop. Next, to set the foreground colour as black and white as background colour, press ‘D’ on the keyboard.
Next, go to ‘Layer’ menu, select ‘New Adjustment Layer’ and then click on ‘Gradient Map’. Close the dialogue box that appears after selecting this option. The image will now be in grayscale.
2. Open the Layer Panel using the F7 key. In the Gradient Map adjustment layer, click on ‘Layer Mask’.
Select the Brush tool from tool panel. Make black as foreground colour and set the value of hardness between 10-20%.
3. Highlighting the required area
Now, start painting the area you want to highlight in your black and white image. Even when you are applying the black brush, the brushed part will show the colours. This happens because the black colour on layer mask will reveal the pixels from the layer that is below this activated layer.
There may be some mistakes while brushing the required area as shown in the figure. These can be fixed by following the next step.
4. Correction in the brushing area
To correct such mistakes, all you need to do is just change the foreground colour to white. Also, make the brush size equal to 15 pixels.
Apply the brush on the area where the colours are revealed mistakenly.
5. Add adjustment layer
Go to ‘Layer’ menu. Select ‘New Adjustment Layer’ option and click on ‘Curves’. Change the preset to ‘Strong Contrast’.
6. Add vibrancy
Select ‘Layer’ menu and click on ‘New Adjustment Layer’. Select the ‘Vibrance’ option. Make the saturation as +92 and vibrancy to +100.
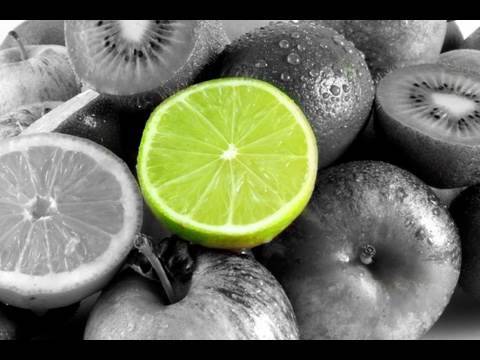
So, your final image with that amazing partial black and white effect image is ready!
By now you must have understood that creating this partial black and white effect in Photoshop is very simple and takes no time at all! So, try it and let your viewers be perplexed!