How to Increase Your Image Size without Losing its Quality Using Photoshop
This tutorial is simply about re-sampling in Photoshop. Following are the steps to be followed.
enlarge-image-size-step-4-2
Step 3
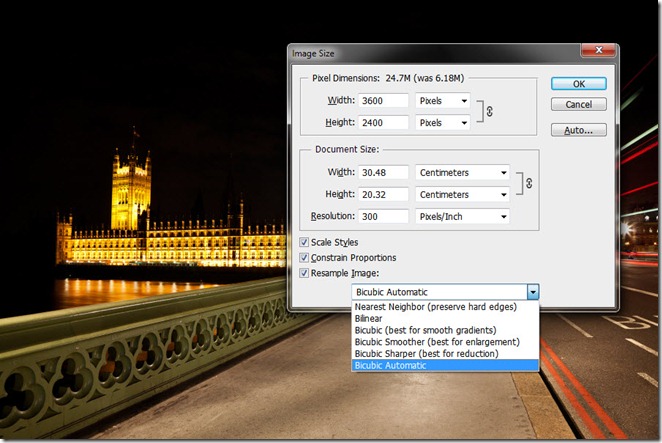
Below the re sample image is a dropdown menu which shows the mathematical algorithm Photoshop uses to enlarge the size of the image (upsampling) or decreasing the image size (downsampling).
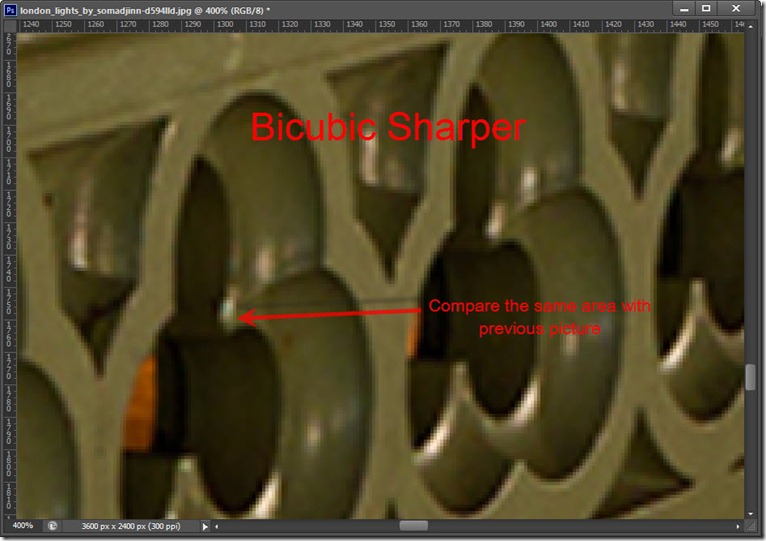
The lowest image quality is achieved by using the “Nearest Neighbor”. In this method, Photoshop copies the colors of the surrounding pixels. Those images which has hard edges like vector uses Nearest Neighbor for crafting jagged edges The other method is the “Bilinear” – This gathers the color of the pixels from the immediate surrounding one’s and averages it. It is now simple to guess the color of the new pixels. This method gives you better quality image and a faster output as compared to Nearest neighbor, though the next ones are the ones you should be using. “Bicubic” is a bit time consuming method as compare to the other two but gives a good output; smoother shifts in places where one color diminishes into another. Biucubic tries to guess the color of the new pixels by gathering the color of the pixels from the immediate surrounding one’s as well as the one surrounding them, giving a wider study area and averages it.